The National Administrator Role
This is the officer who operates at the national level.
Note
In order to try out the functions contained in this section, it is assumed that one has read the Introduction section and has logged into the system and also referred to the implementation guide. A copy of the KMHFL implementation guide can be downloaded here.
- The main responsibility include:
- User account management
- User Roles management
- Management of all matters regarding system setup
County Management
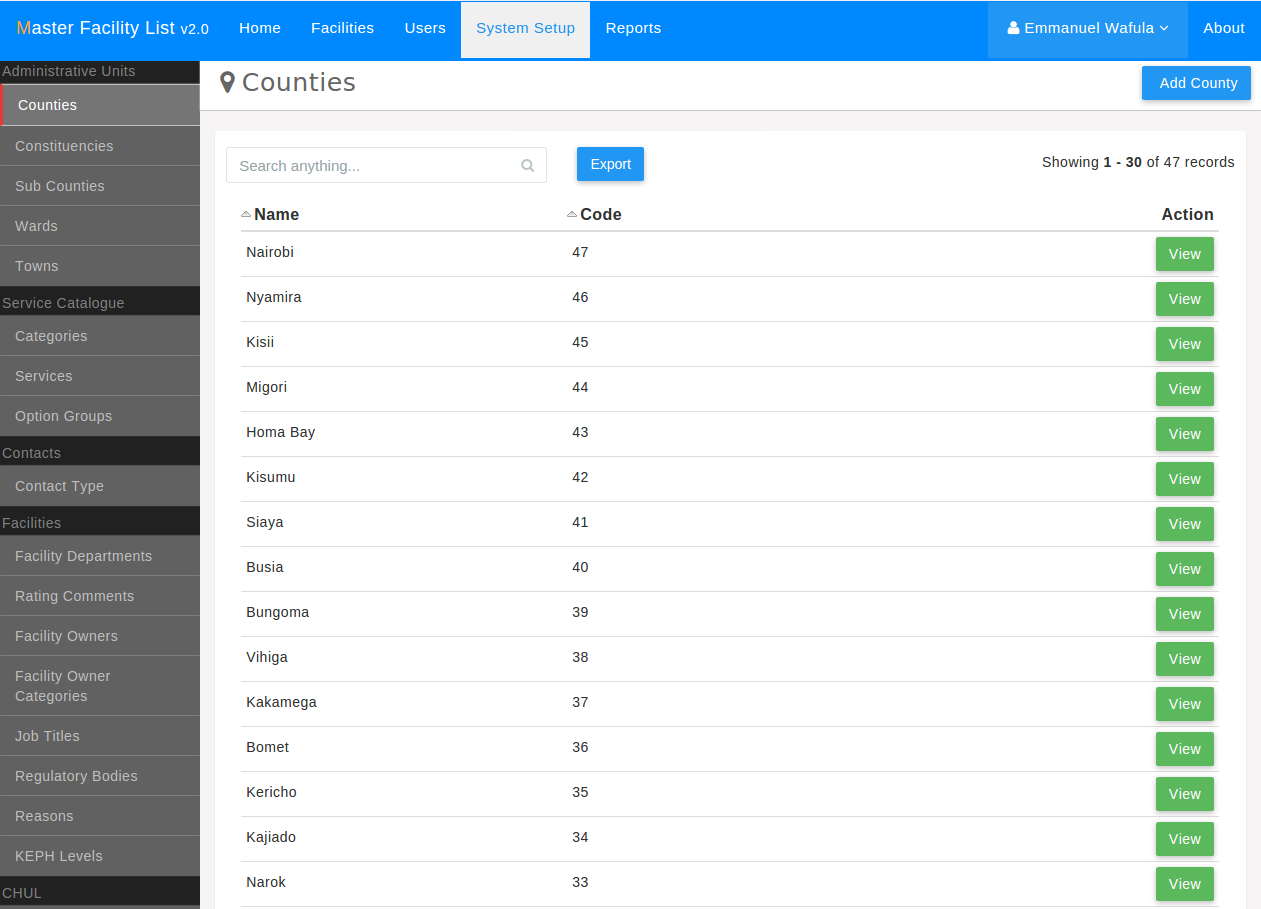
To begin on system setup the National Administrator should click the
System Setup link on the main navigation bar this opens up a screen with a
Counties link on the sidebar with a list of all the counties in Kenya.
On the top right of the screen below a user can click the Add County button to
add a new county or click view in the list to view a particular county and to edit details of the same.
Constituency Management
The next link on the sidebar is the Constituencies link. The National
Administrator can carry out the same tasks as in County, using the
Add Constituency button in the top right of the image below.
To view and edit details of a constituency the user clicks the View button
in the grid aligned to the particular constituency record of interest to the user.

Sub-County Management
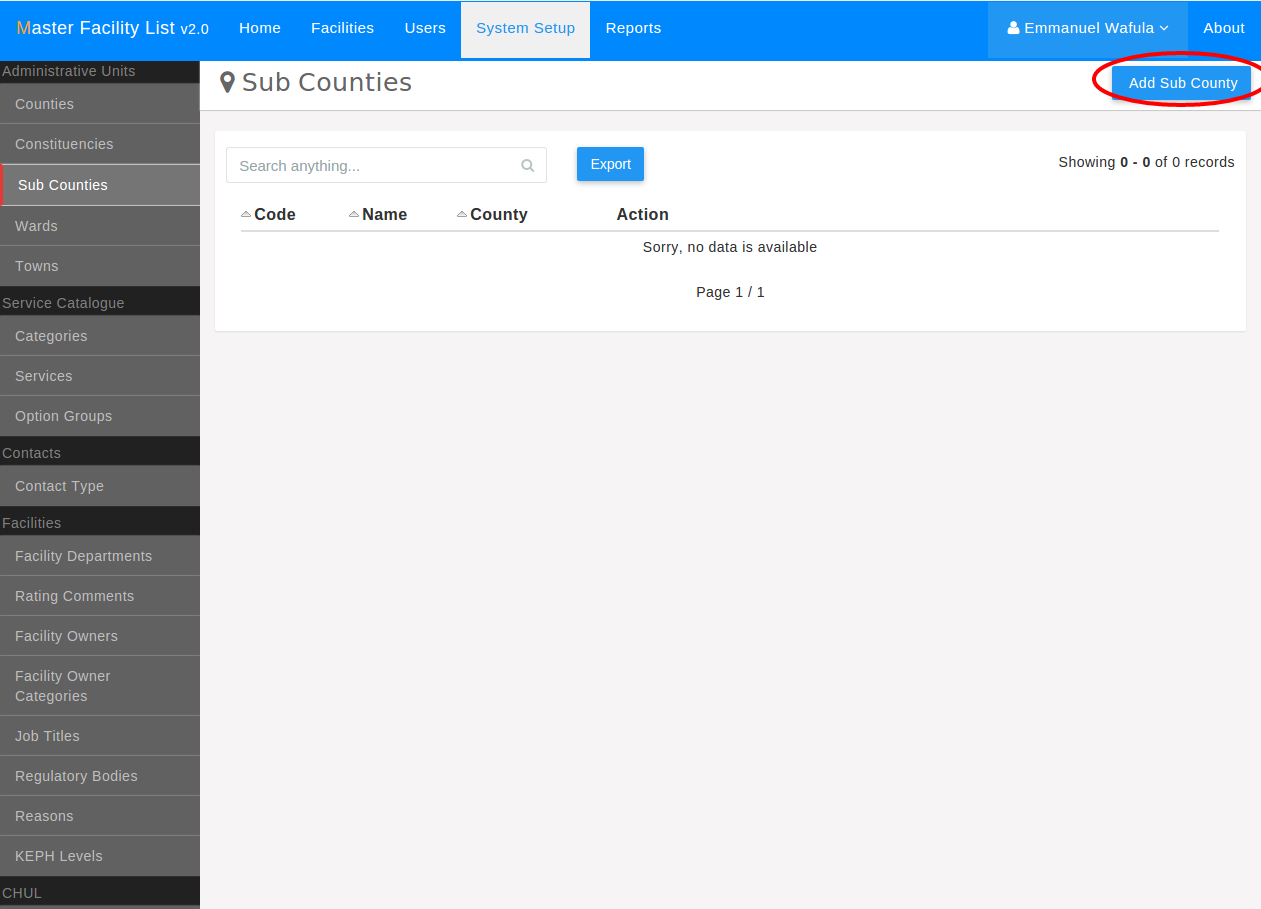
To manage sub-counties, the National Administrator clicks Sub-Counties link
on the sidebar that list all sub-counties with a view button.
The user clicks the view button if they would like to view details of the
single sub-county or edit details of the same.
To the top right of the Sub-county list is the Add Sub-county
button which user clicks to take them to the view where they
input details of a new Sub-county and save these details.
Wards Management
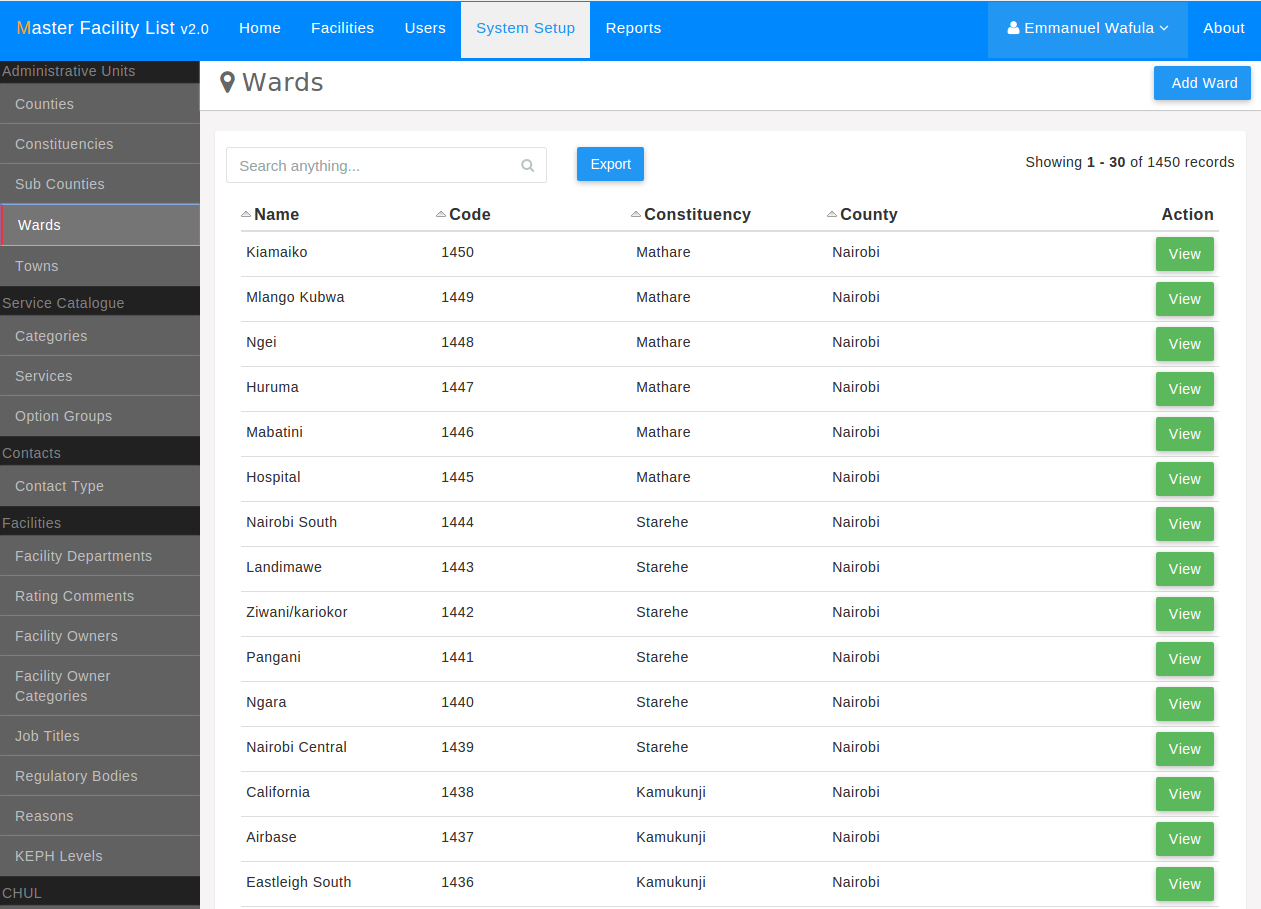
For wards management the National Administrator clicks the Wards link
on the sidebar pulling up a view like the previous admin units.
The Add Ward button is to the top right for adding a new ward.
The view button in the grid inline with a particular record is
to enable a user view and edit details of a particular ward.
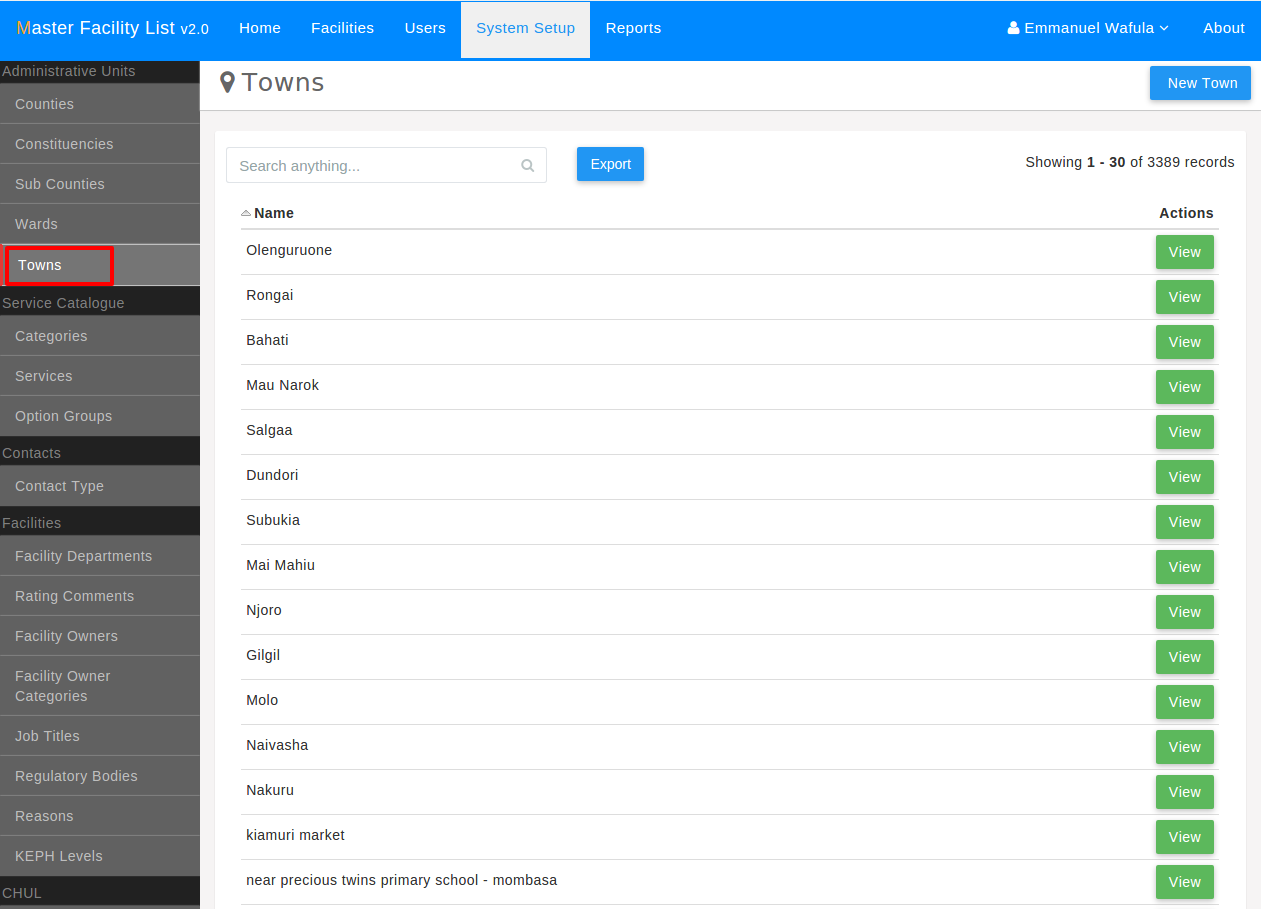
Towns Management
To carry out towns management, the National Administrator clicks the
Town link on the sidebar. This lists all towns in a grid.
To the top right is the New Town button enabling a user add a new town.
In the towns grid there is an inlined View button in each record to enable
a user view and make edits to records of a particular town.
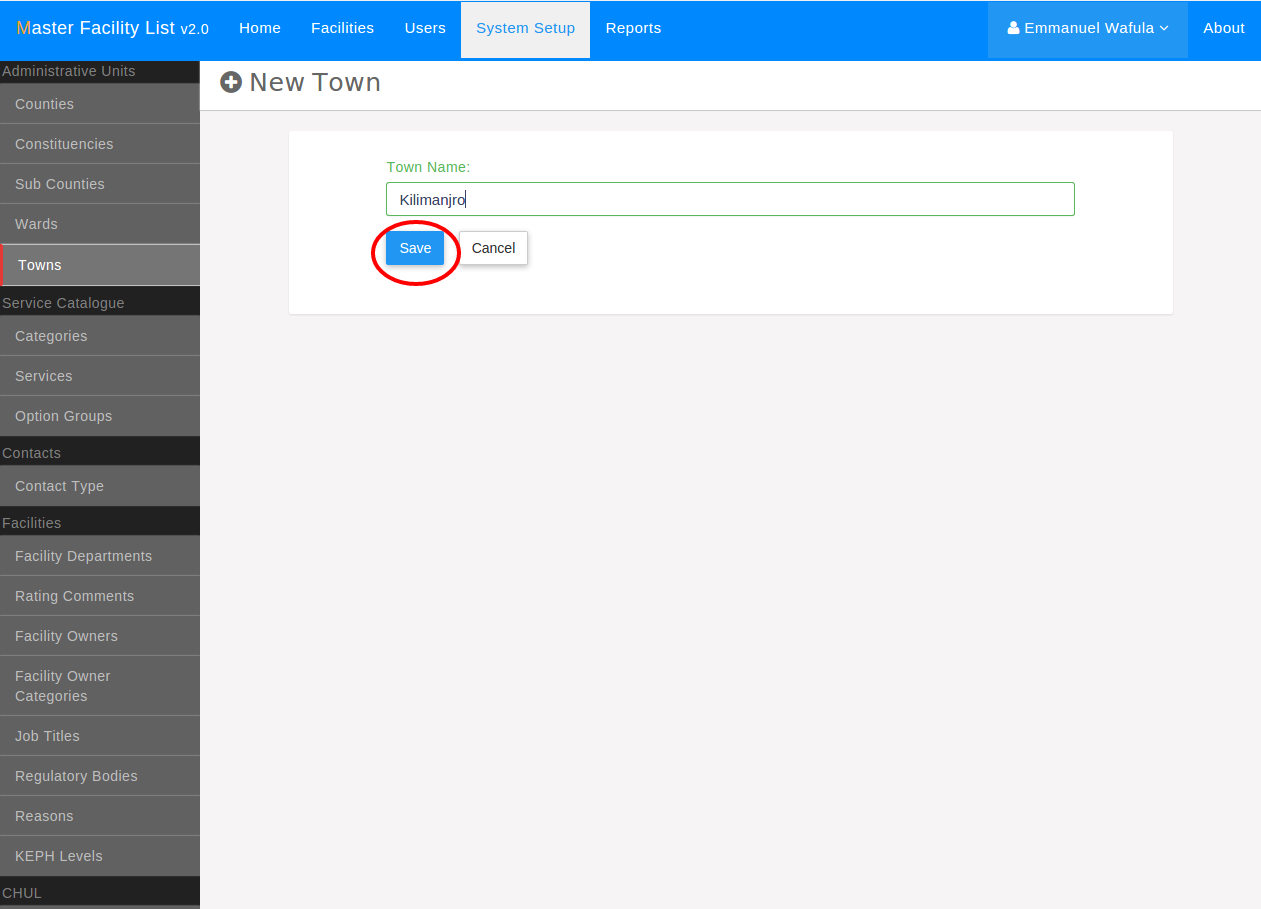
Below is the next view after a user clicks the New Town button,
which is a form requiring the user to input the name of the new town
after which they click the Save button in order to save the town as shown below.
Service Catalog Management
Another task of the National Administrator includes management of the
service catalogue. The service catalogue constitutes: service categories,
health services and service options. The link to manage these three items
the National Administrator clicks the System Setup link on the
navigation bar and goes to the next sidebar sub-menu which is
Service Catalogue after administrative unit sub-menu.
Service Categories
The first item on the Service Catalogue sub-menu is Categories link
which is where service categories are managed. When the link is clicked
it lists the service categories’ names, codes e.t.c.
To view and edit details of one of the service categories the National
Administrator clicks the View button inlined with the relevant record.
To add a new category, the Natinal Administrator clicks the Add Category
button on the top right of the screen.

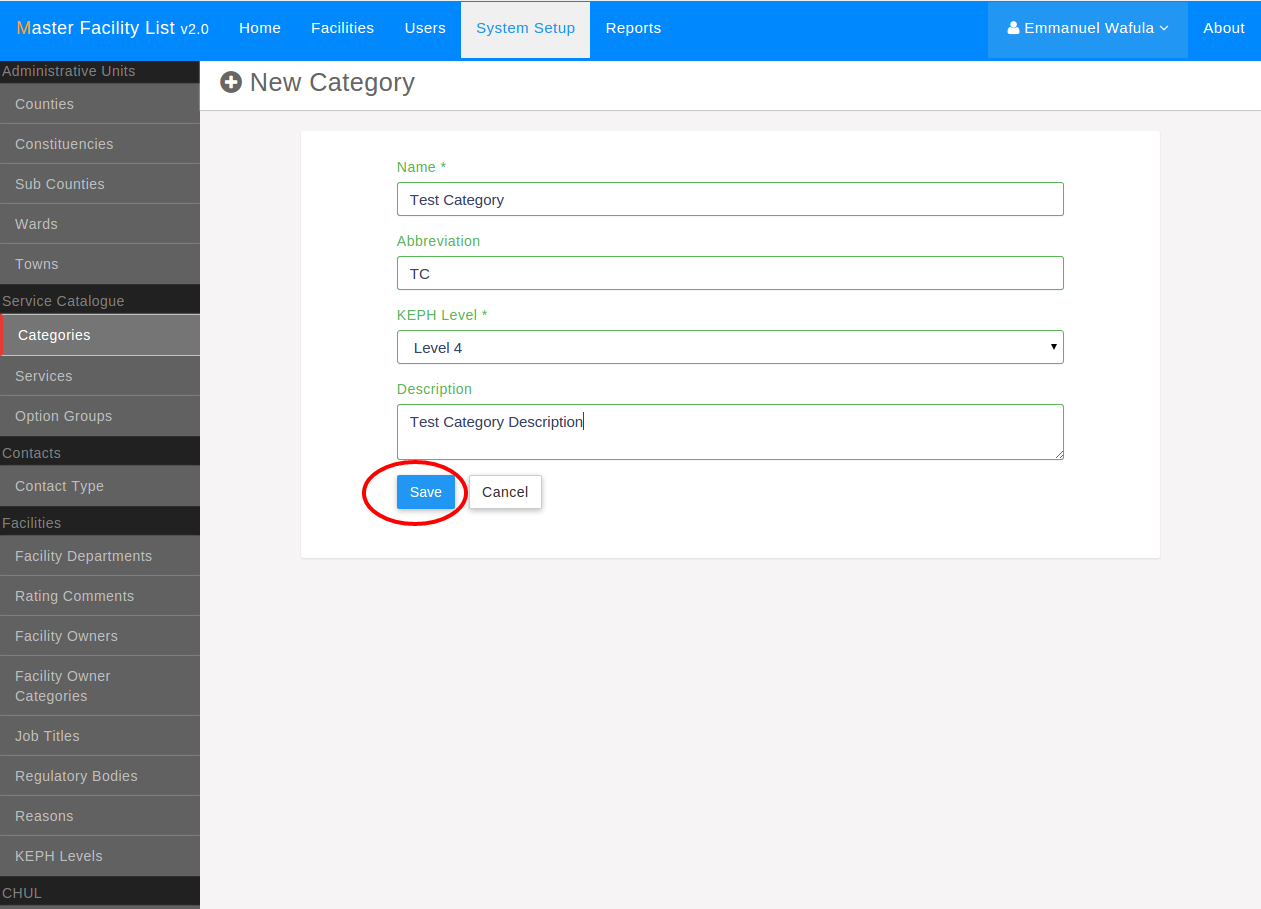
On clicking the Add Category link the view below is brought up, for
user to enter the details of the new service category including:
category name, abbreviation, KEPH level and a brief description of the same.
The National Administration then clicks the Save button below the form to
save details of the new service category.
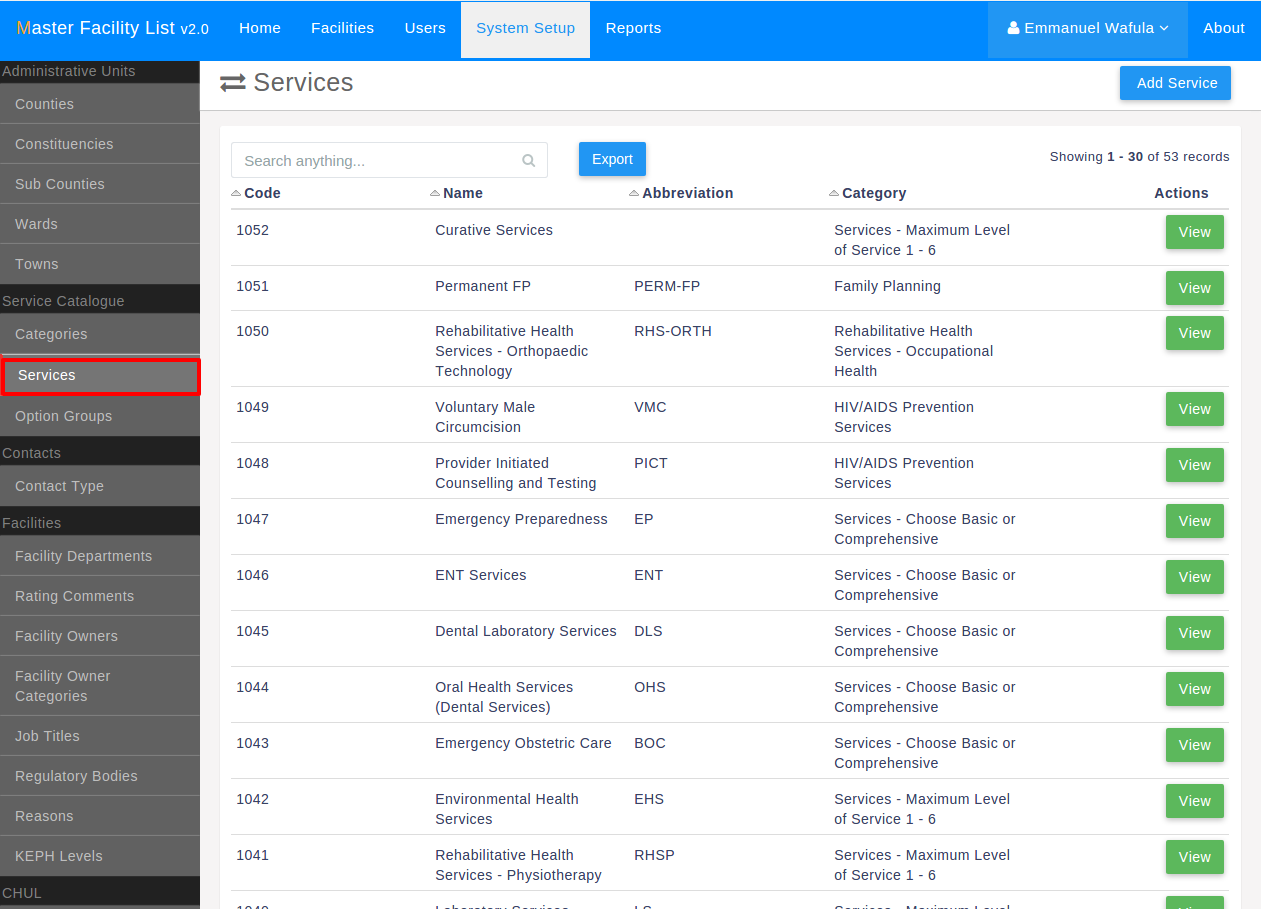
Services
The next item on the service catalogue sub-menu is the Services link.
The National Administrator clicks this link that brings up grid listing
services with view button to view and edit details of a particular service.
To the top right of services listing view is the Add Service button.
The National Administrator clicks this button to add a new service.
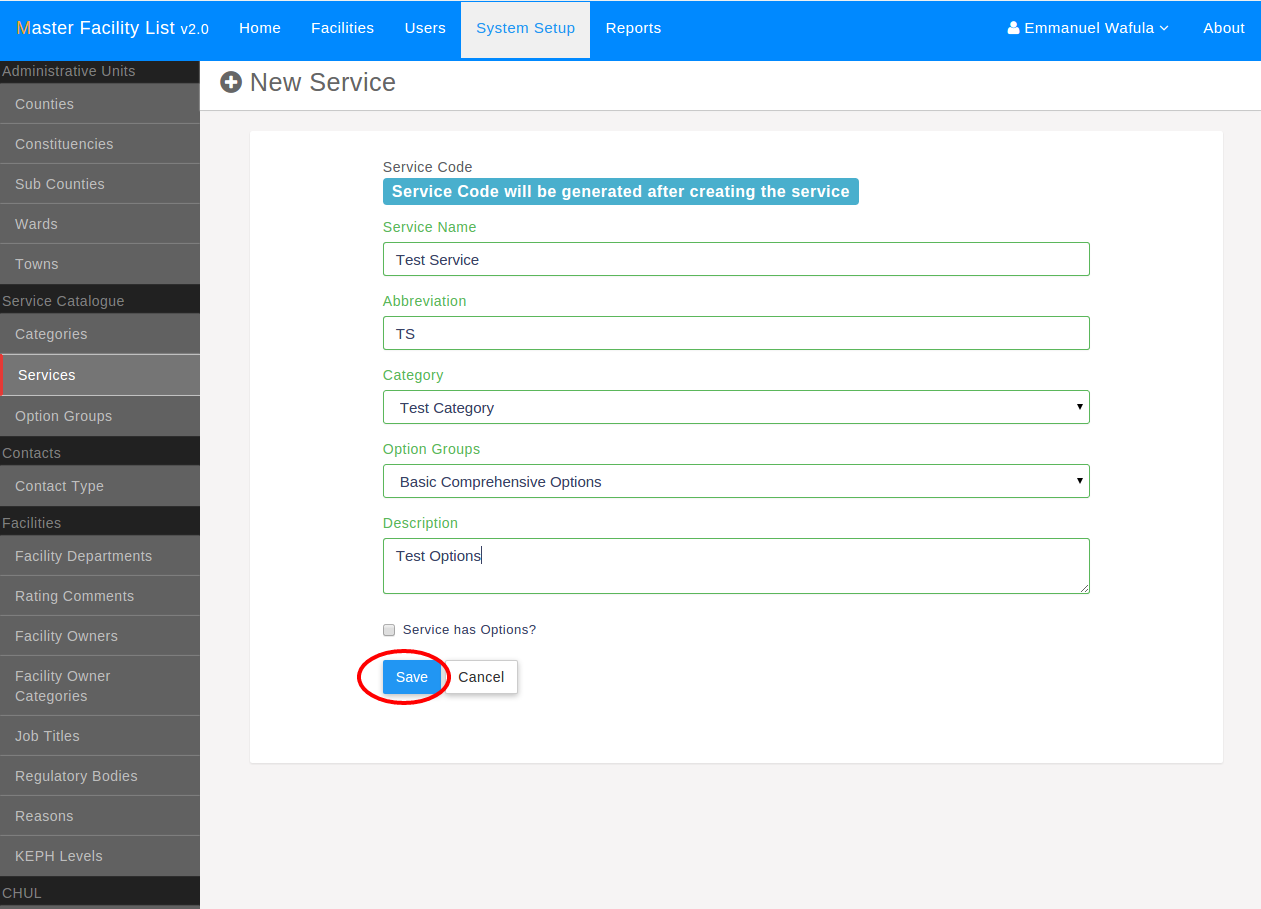
On clicking of the Add Service link the view below is brought up, consisting of
a form where the National Administrator input the details of the new service
including: name, category, option group and brief description of the health service.
When finished the user clicks the save button to save the new service and its details.
Option Groups
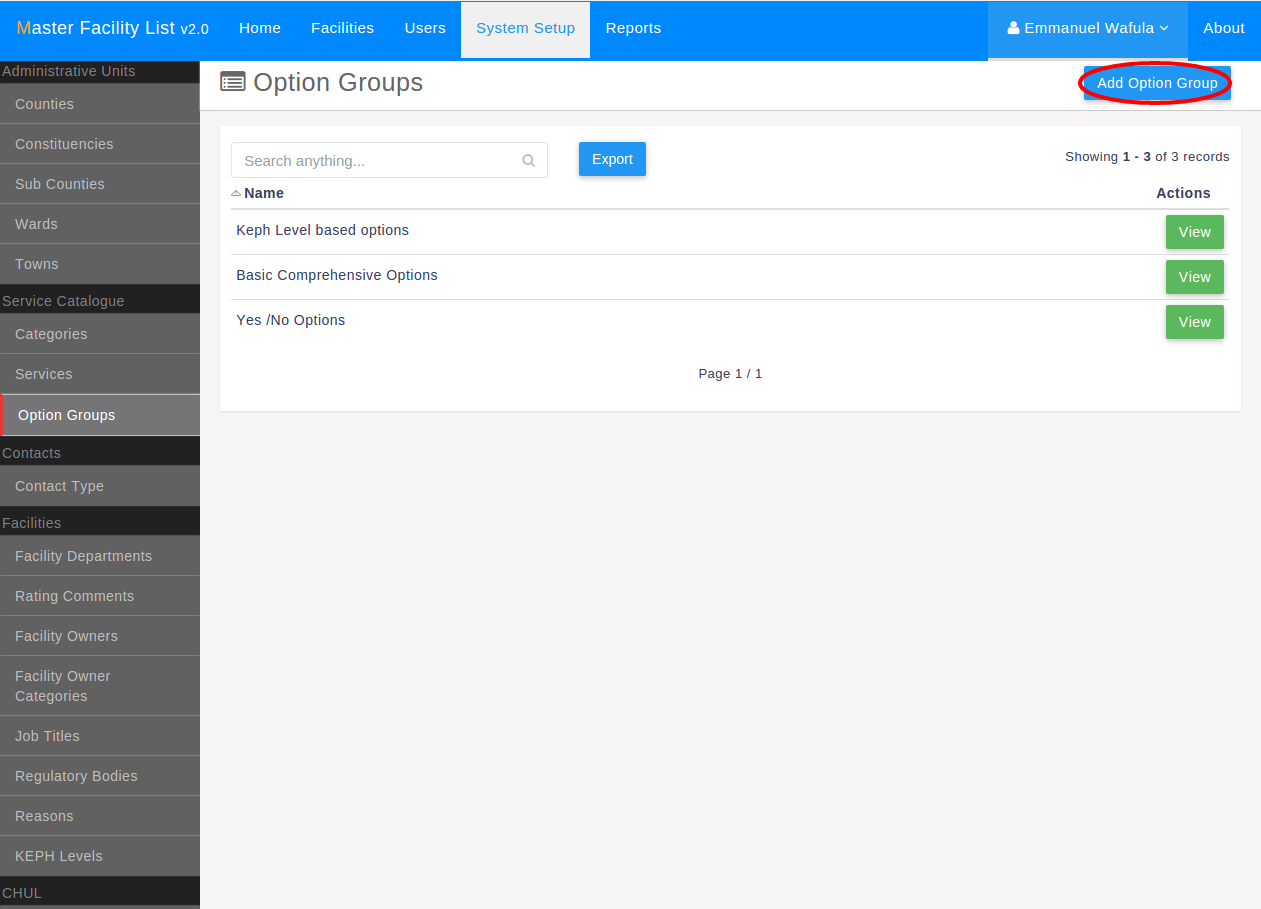
The final item on the service catalogue sub-menu is the Option Group link.
The National Administrator clicks this link to list the option groups.
Each record in the inlist has a view button, which the National Administrator
clicks to view and or edit the details of the option group.
On the top right of the option list view is the Add Option Group link
that the National Administrator clicks to add a new option group.
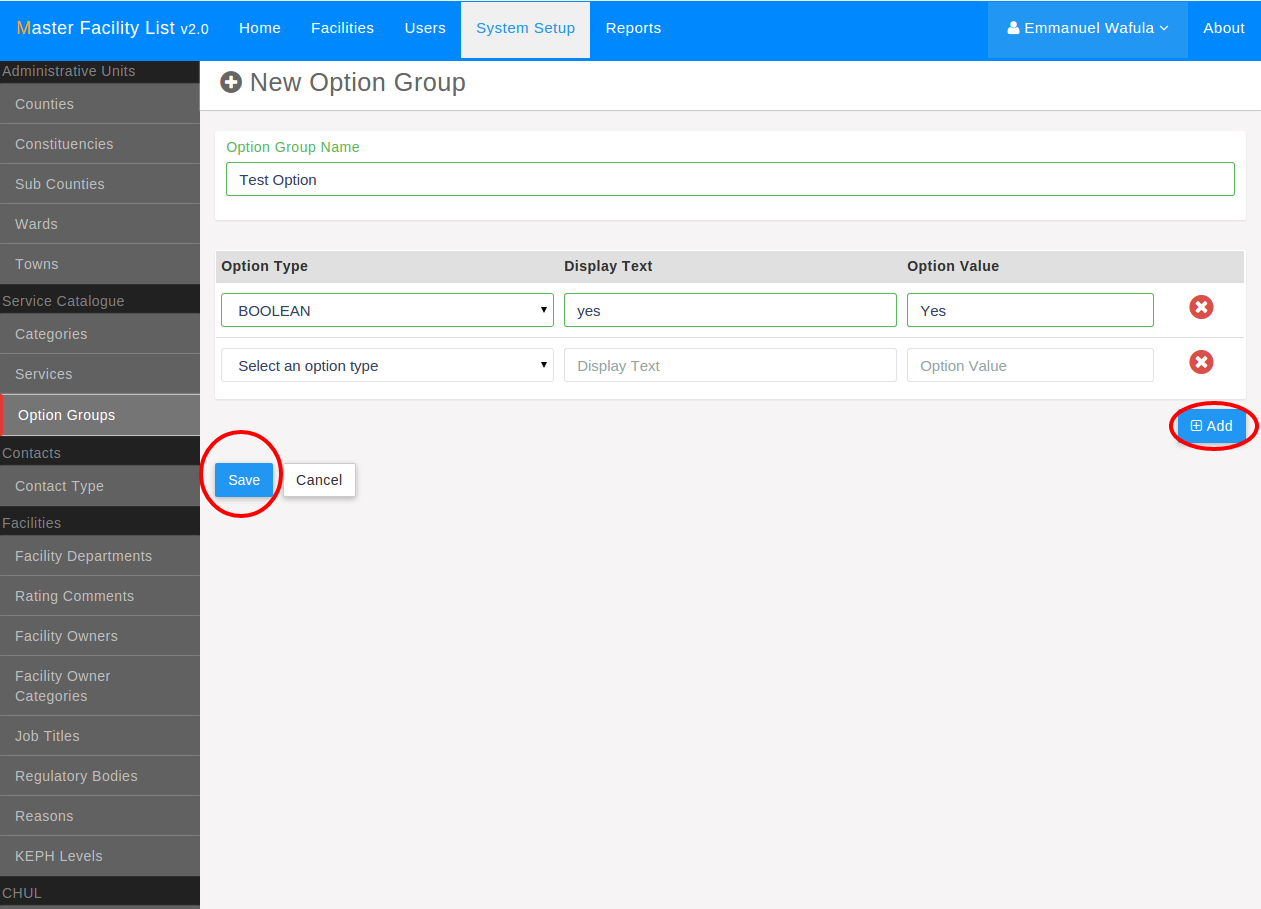
On clicking the Add Option Group link the view below is brought up with a
form where the National Administrator enters the details of the new option group
being created including the option name, and options within the option groups.
The National Administrator clicks the Add button to add a new row where
details of an option including its type, display text and value can be entered.
Finally to save the details the National Administrator clicks the save button.
Contact Types Management
Contact types for all contacts (users, facilities e.t.c) are centrally managed here. They are available at the contact types section of the system setup.
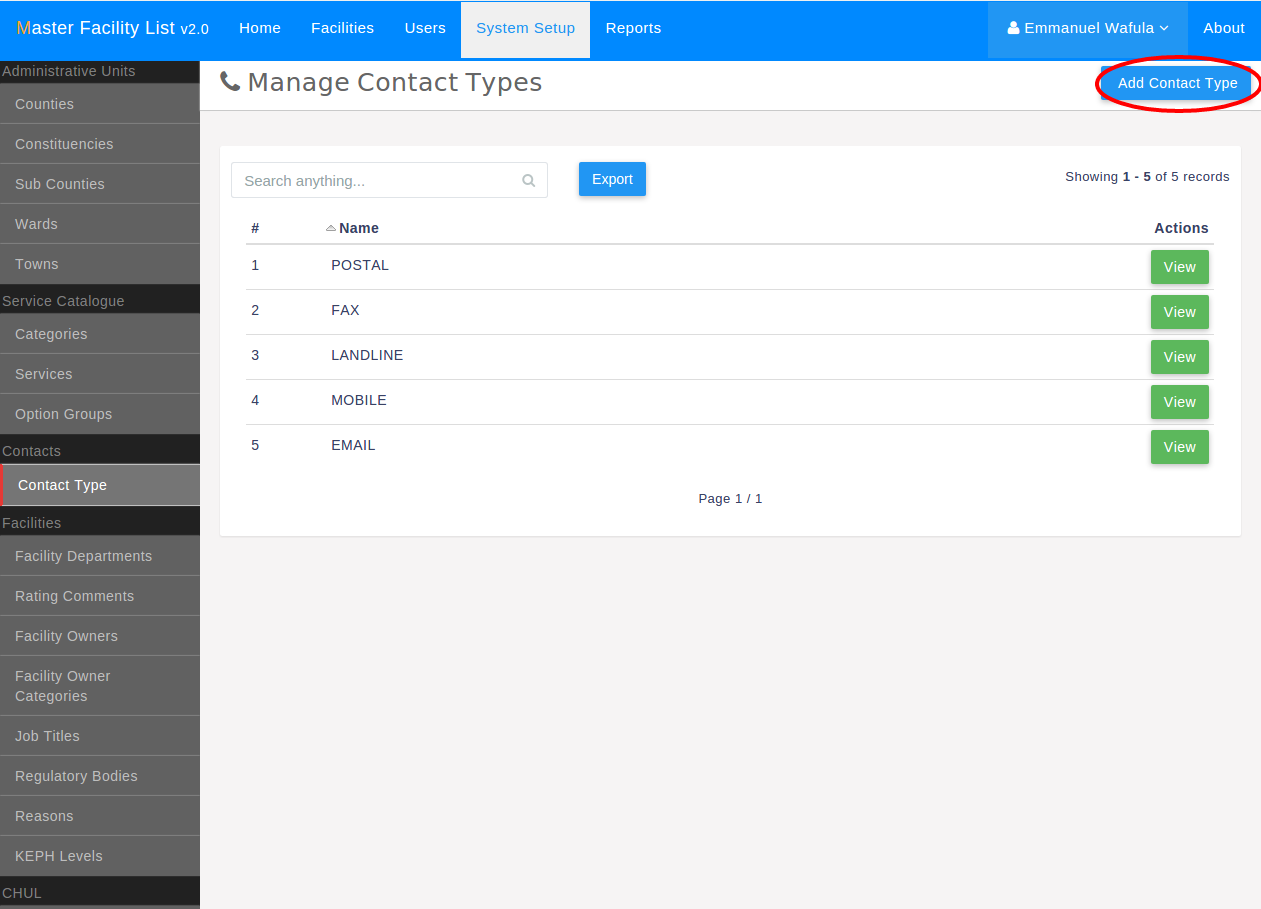
New contact types can be added and existing ones updated or removed.

Facility Departments Management
Departments are the various sections in a facility that may have different regulation from the main facility. They serve as choices when entering a facility’s regulation.
Facility departments are available at the facility departments section of the system
setup.
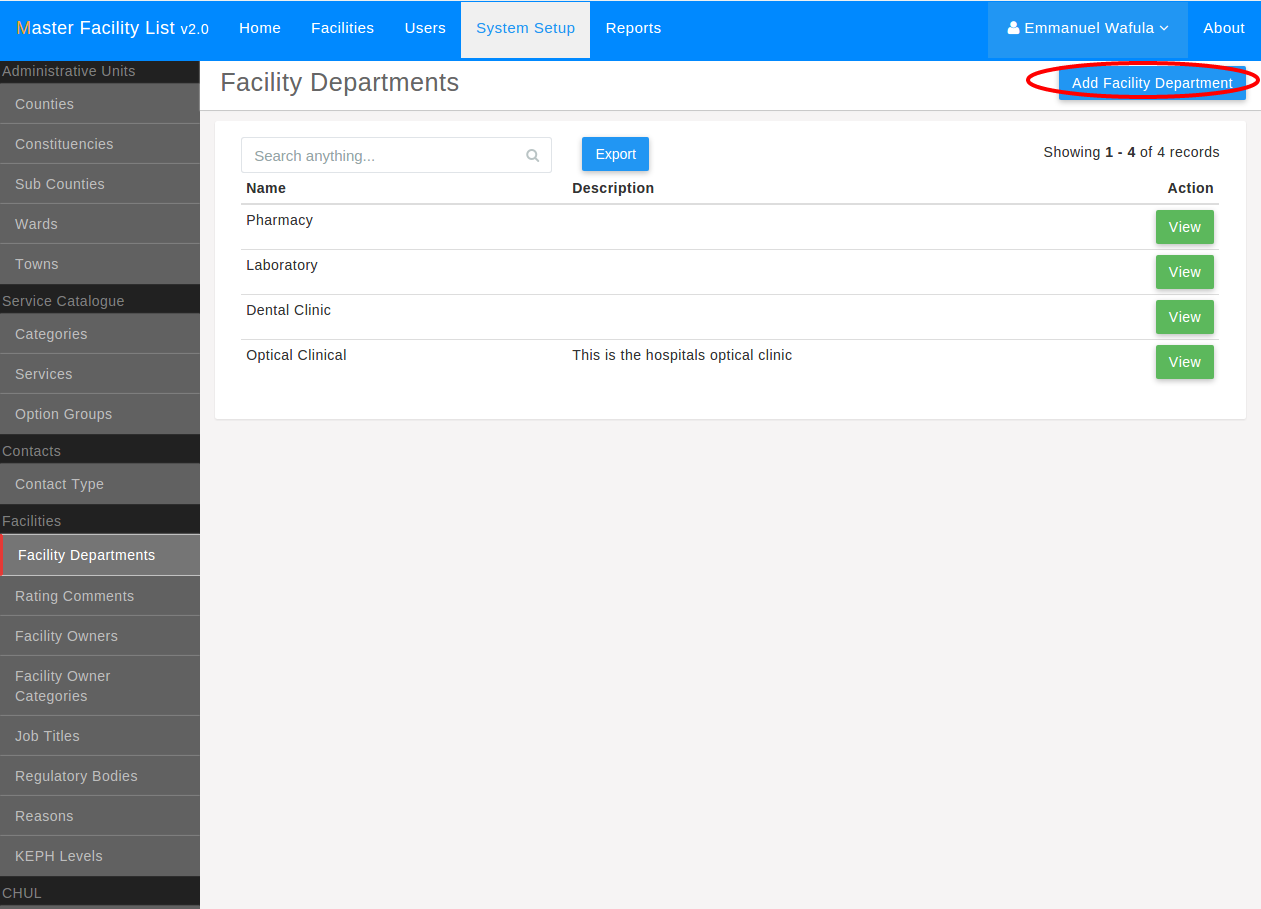
New entries can be added while existing ones can be updated or removed.

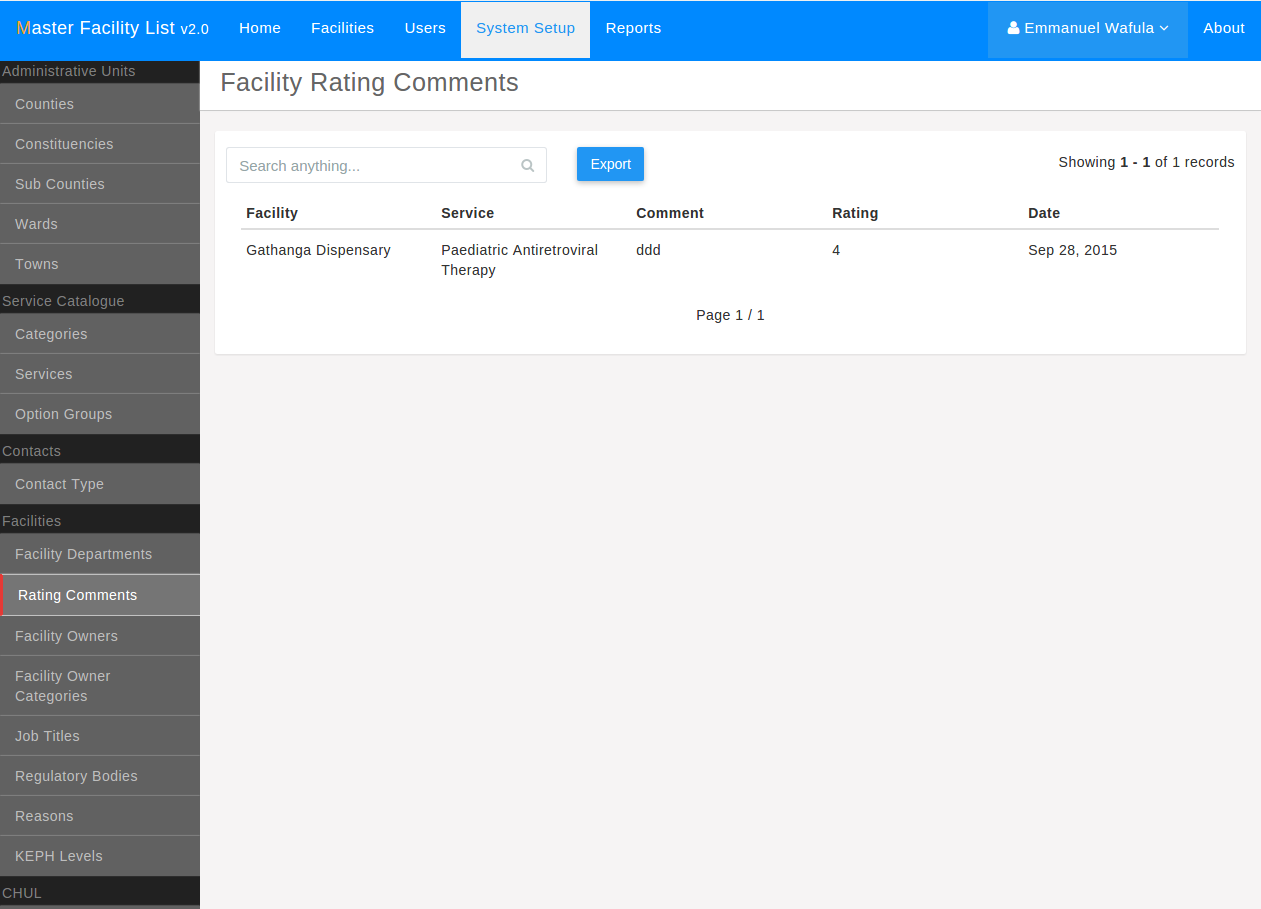
Public Feedback on Facilities
Users of the public side of MFL can rate and comment on facility services. This feedback is available
on the rating comments section of the system setup.
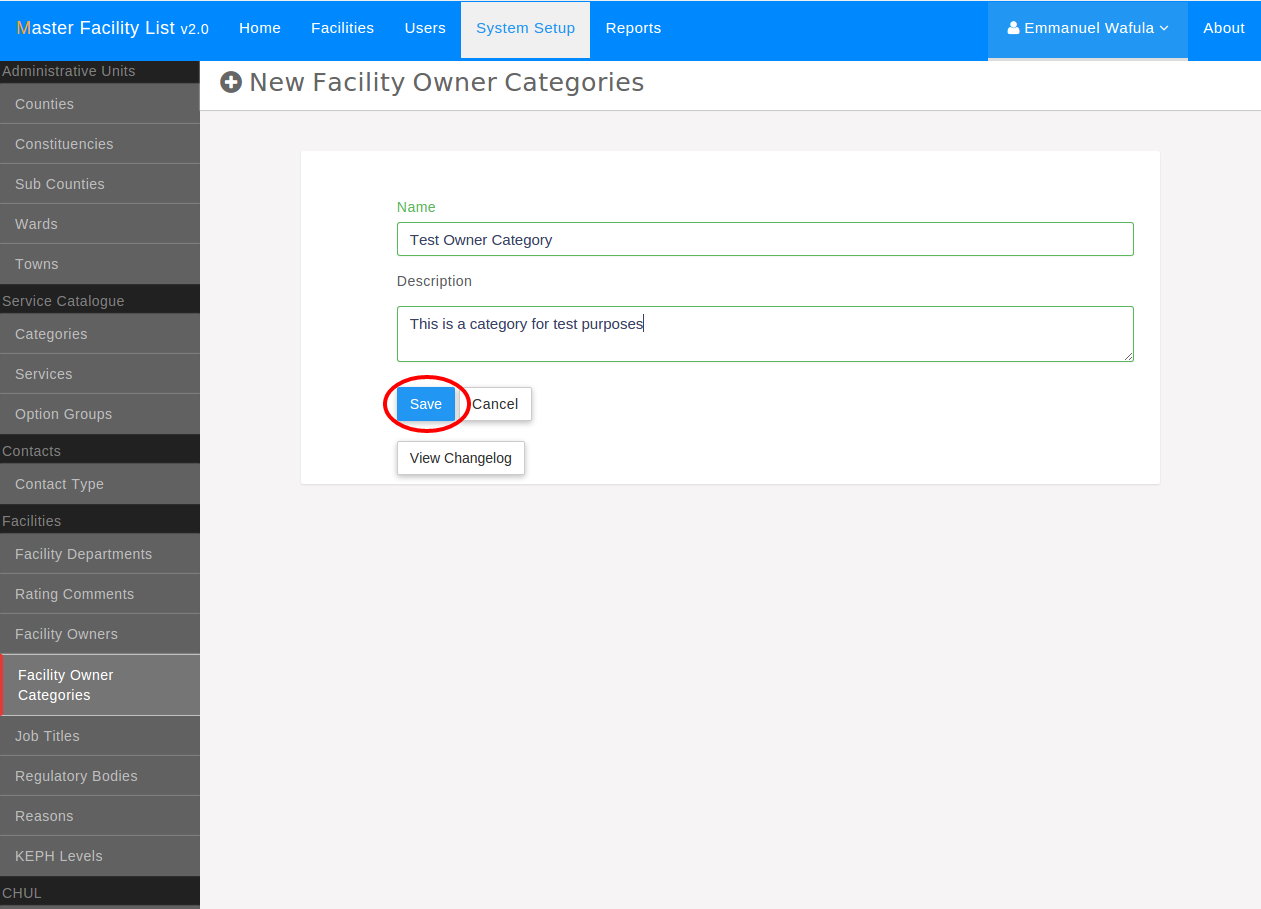
Facility Owner Categories
These are the categories in which facility owners are grouped. They can be accessed in the facility owner
categories section of the system setup.
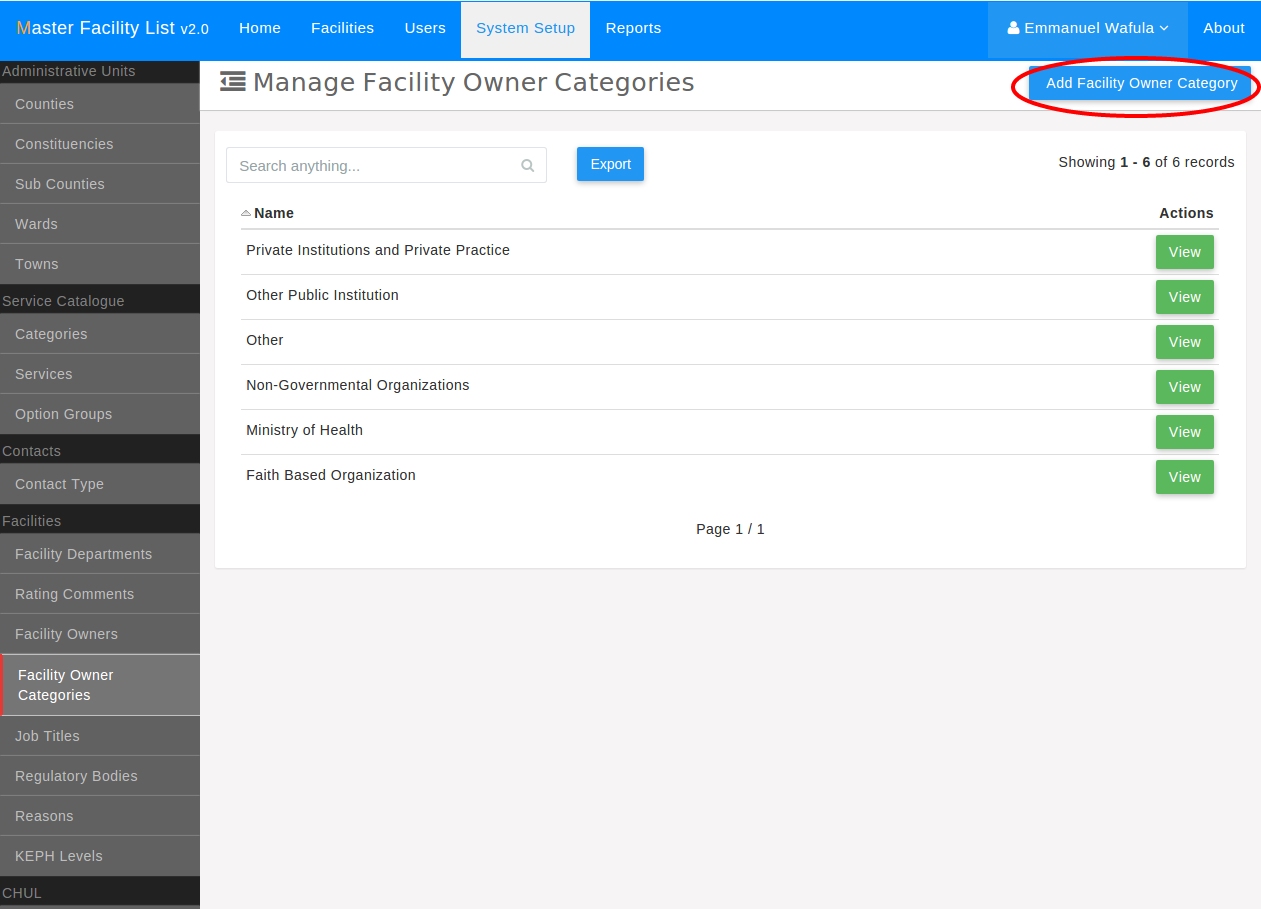
Existing entries can be updated or removed while new categories can be added.
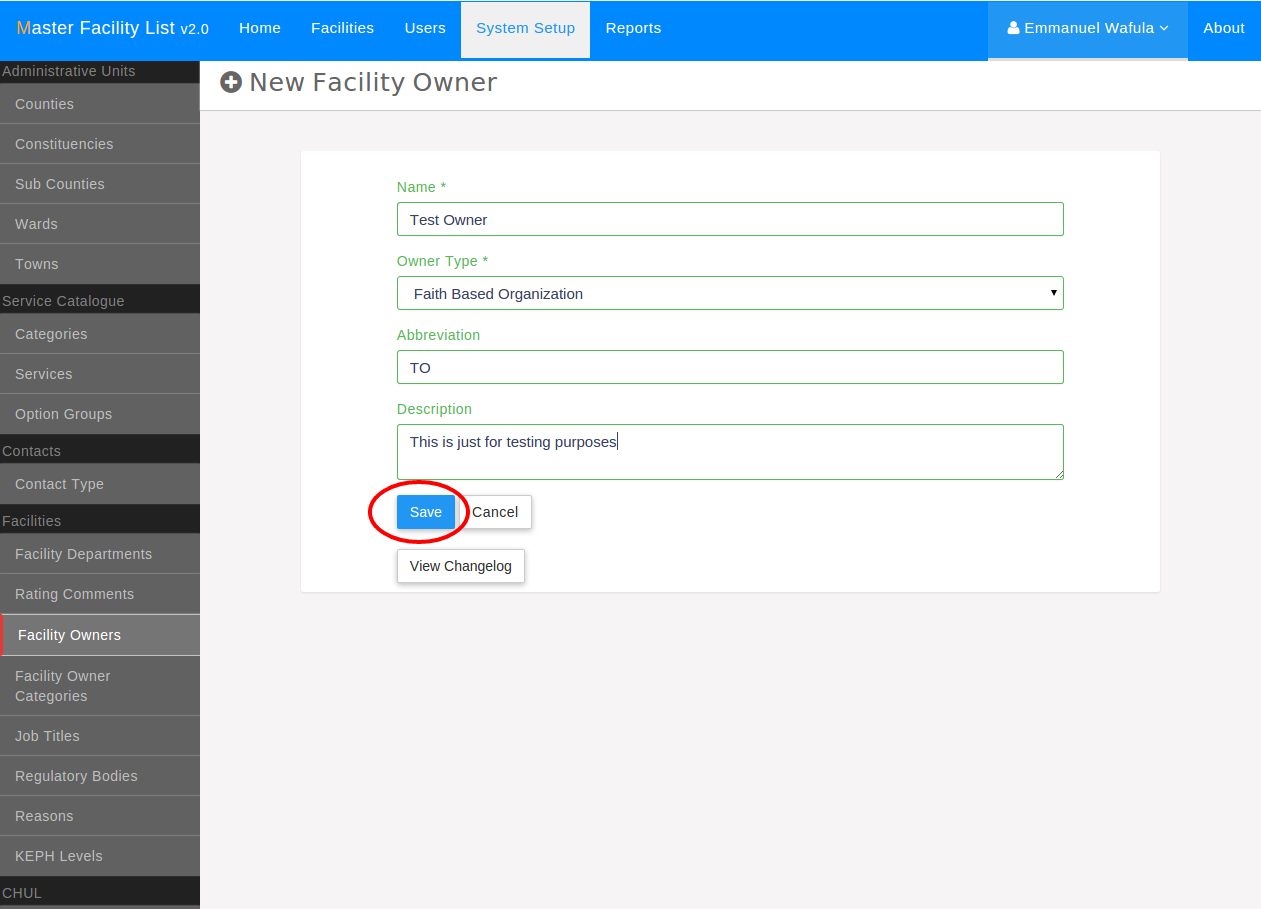
Facility Owners
These are individual owners of facilities. They are tied to a facility category. The facility owners
section of the system setup manages them.
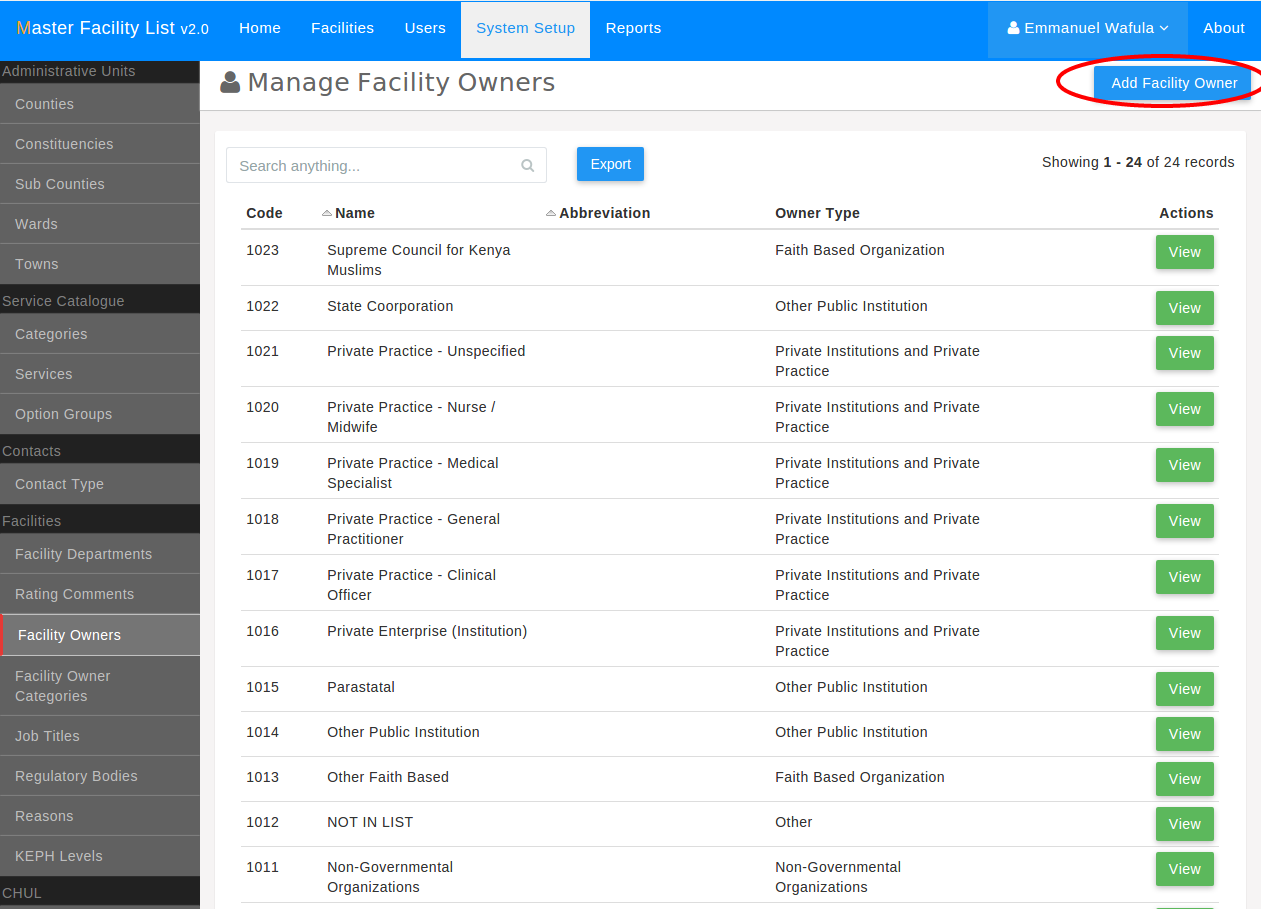
New entries can be added while existing ones updated or removed.
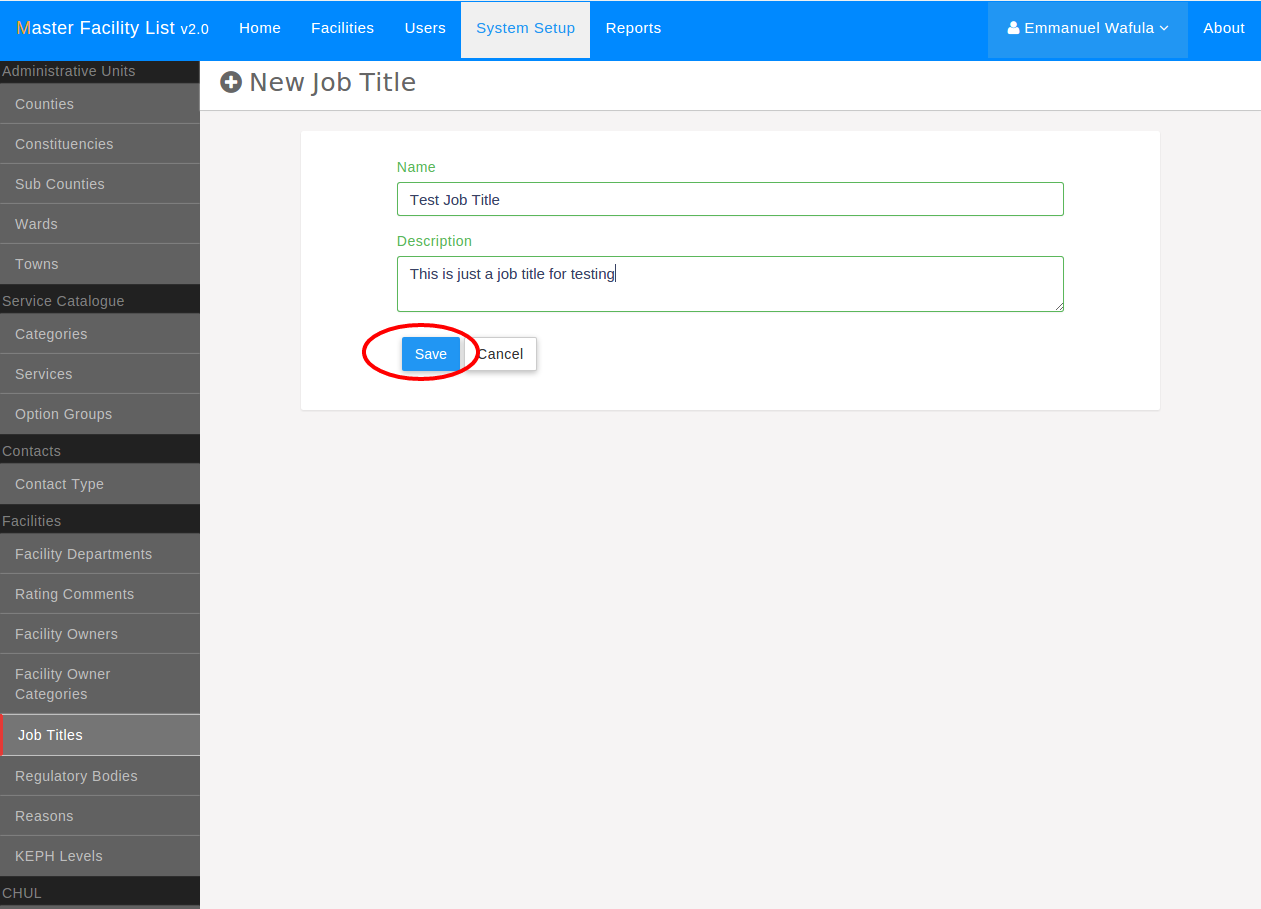
Job Title Management
These are job titles used when entering information e.g. facility officers. They can be managed via the
job titles section of system setup.

New titles can be created while existing ones updated or removed.
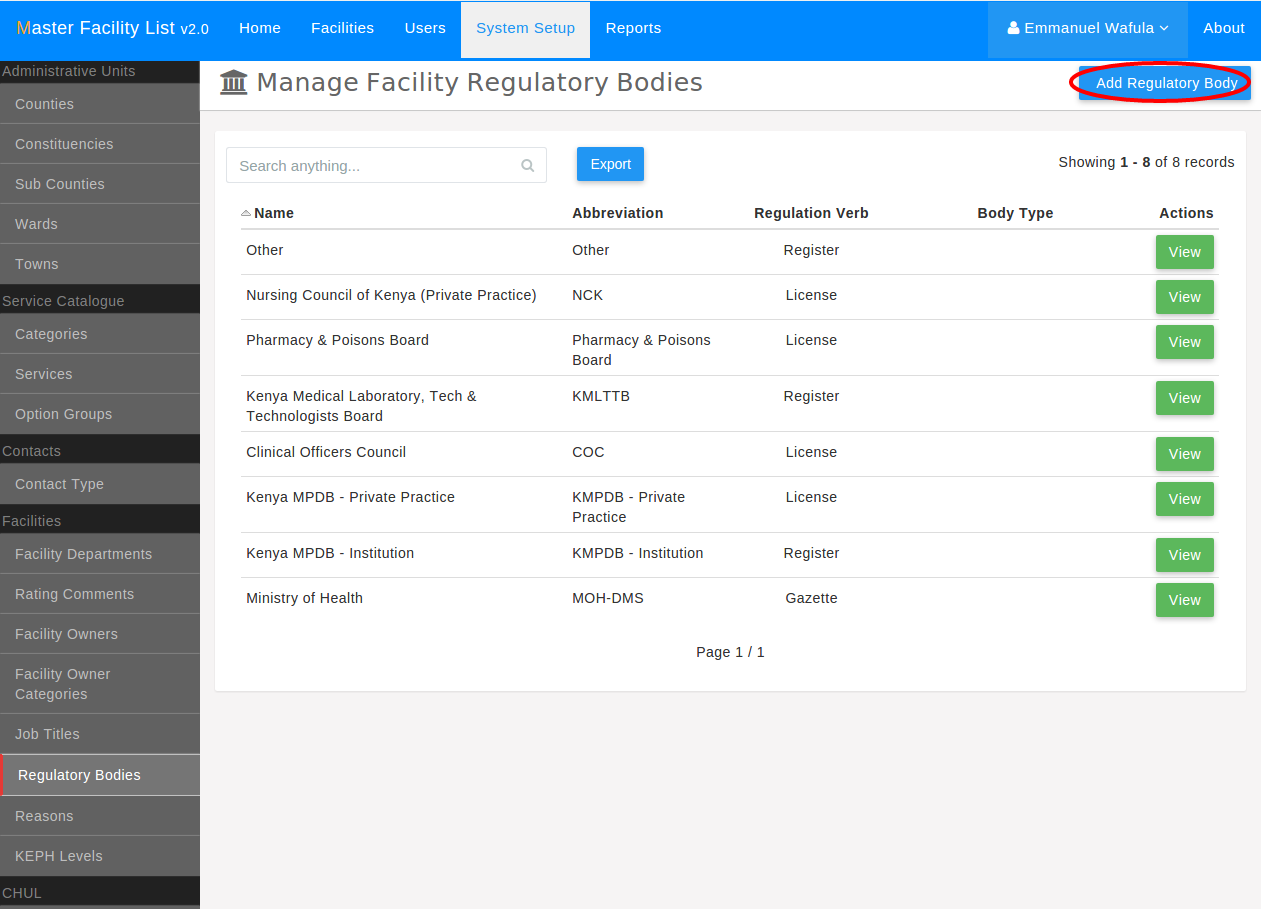
Regulatory Body Management
Regulatory bodies are the ones that register and regulate facilities. They give MFL updates on facility’s regulation status.
Their management can be accessed via the regulatory bodies section of the system setup.
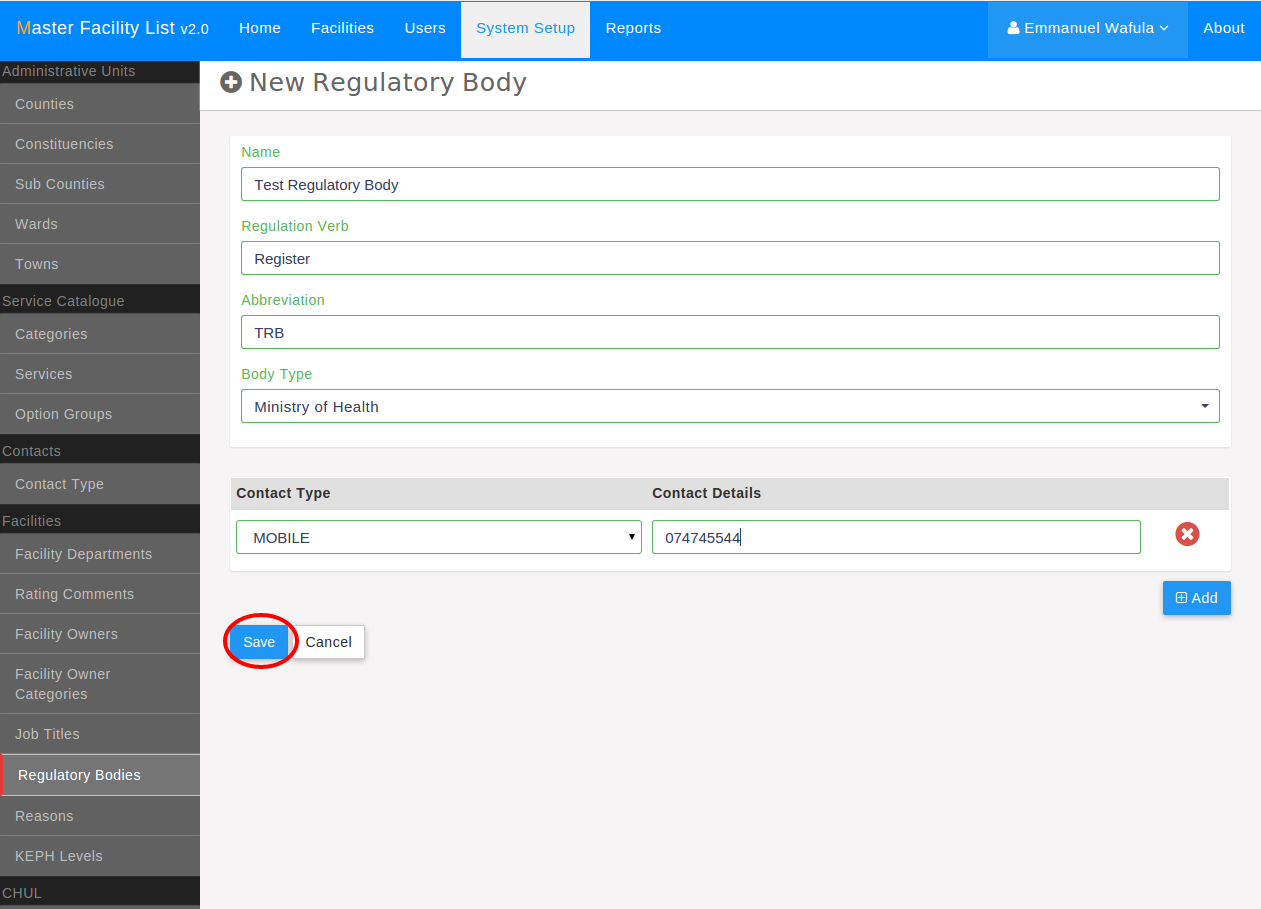
New bodies can be added while existing ones updated or removed.
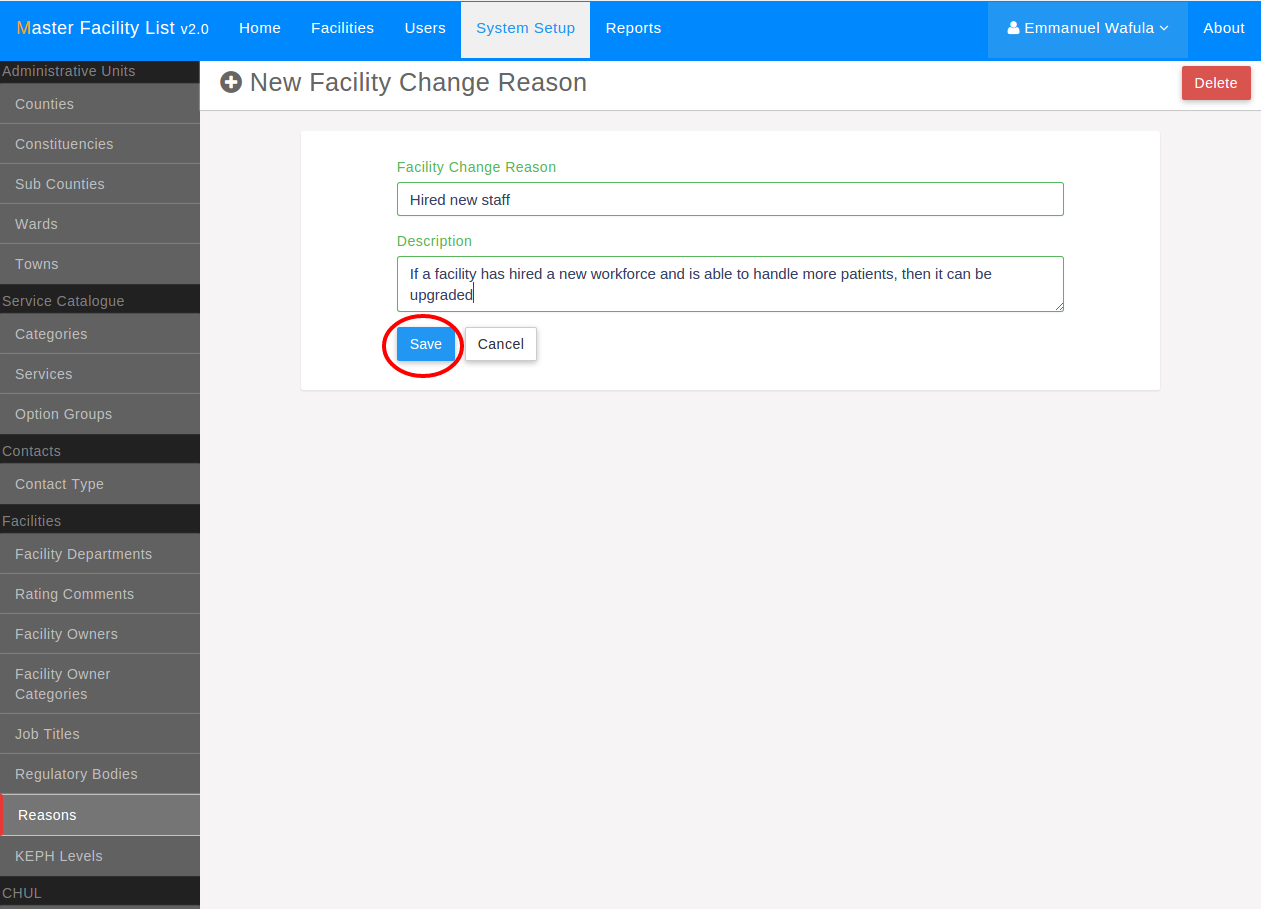
Upgrade/Downgrade Reasons Management
These are the reasons used by CHRIOS/SCHRIOS when upgrading or downgrading
facilities. They can be accessed from the Reasons section of system setup.
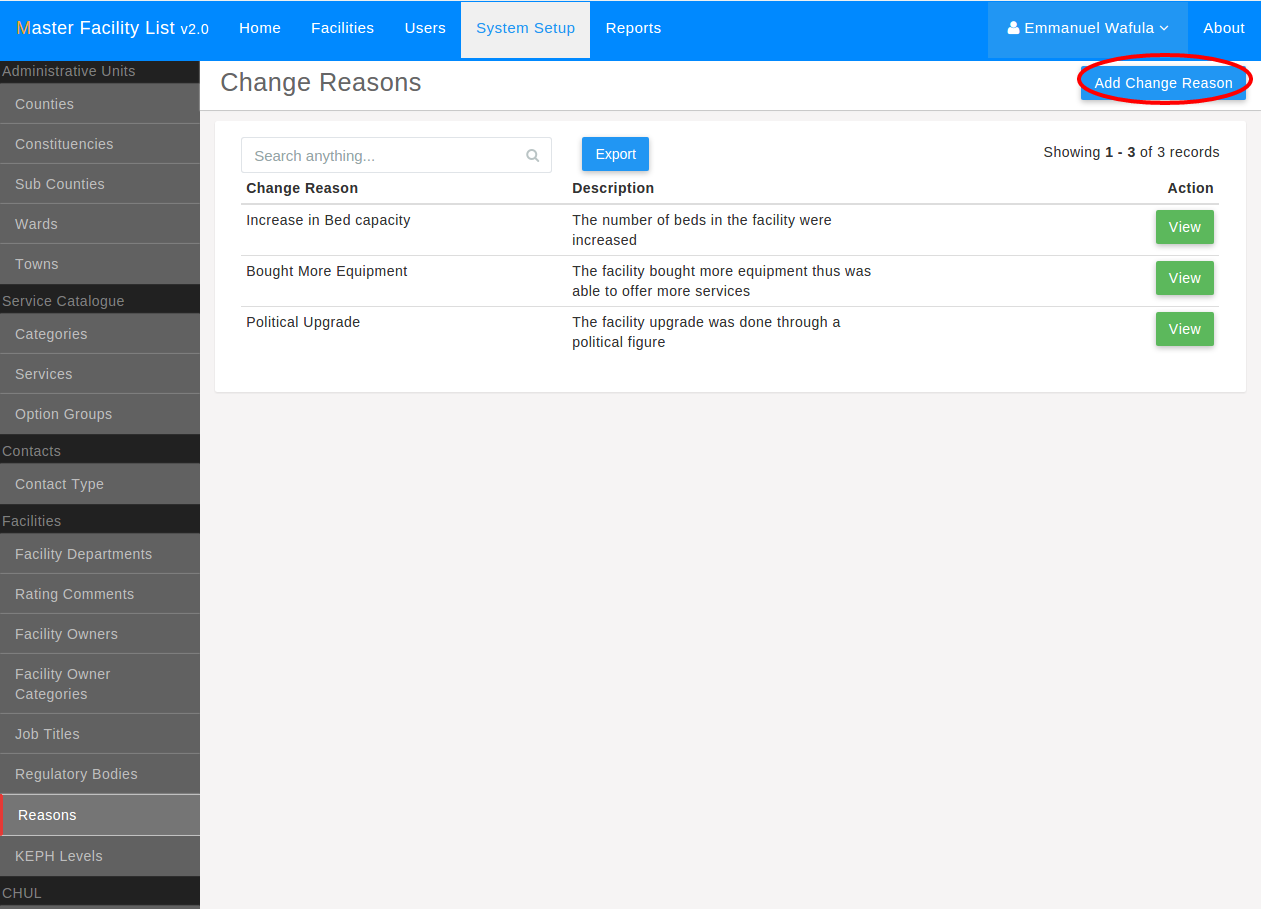
Reasons can be created, updated or removed.
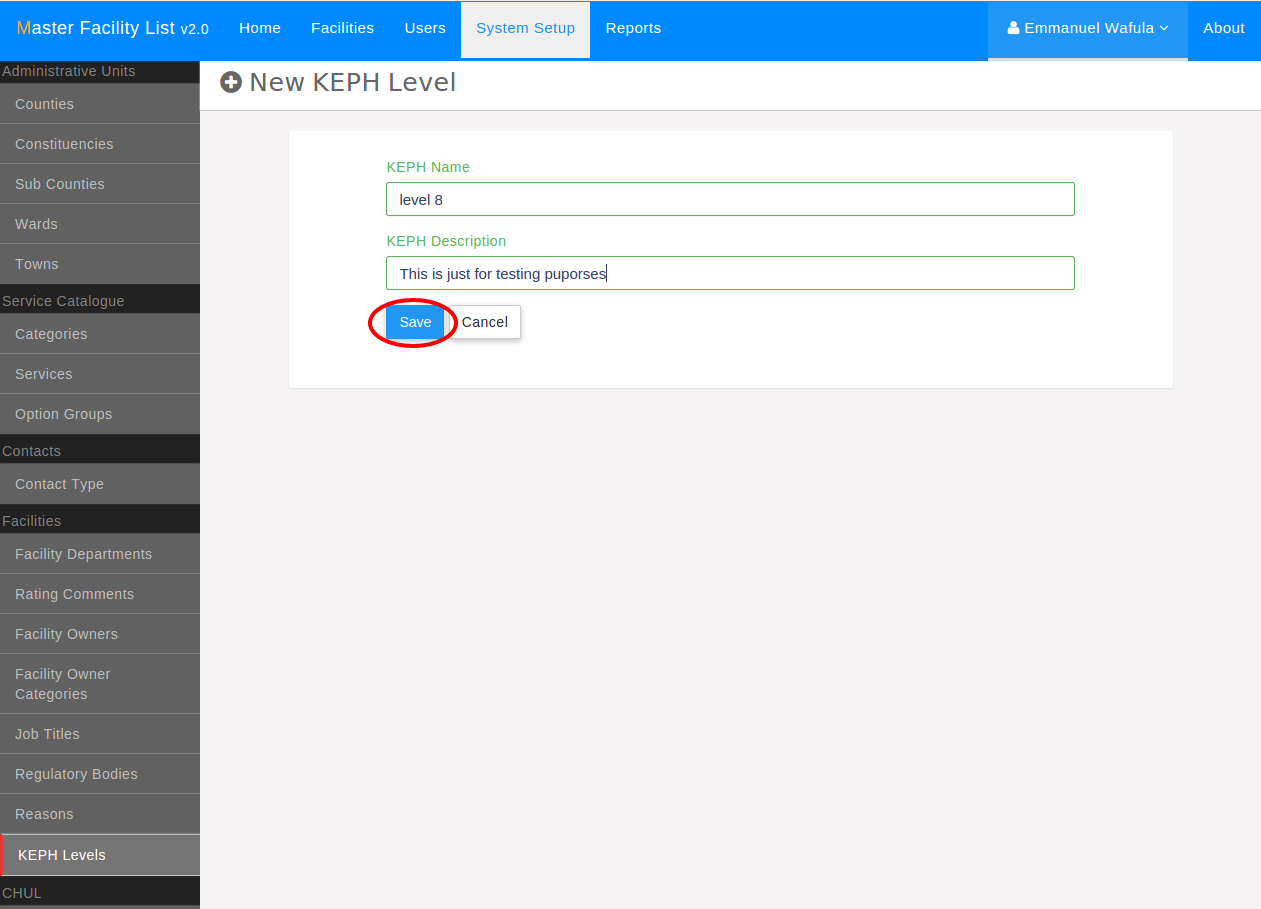
KEPH Levels Management
Facility KEPH levels can be managed from the KEPH Levels section of the
system
setup
.
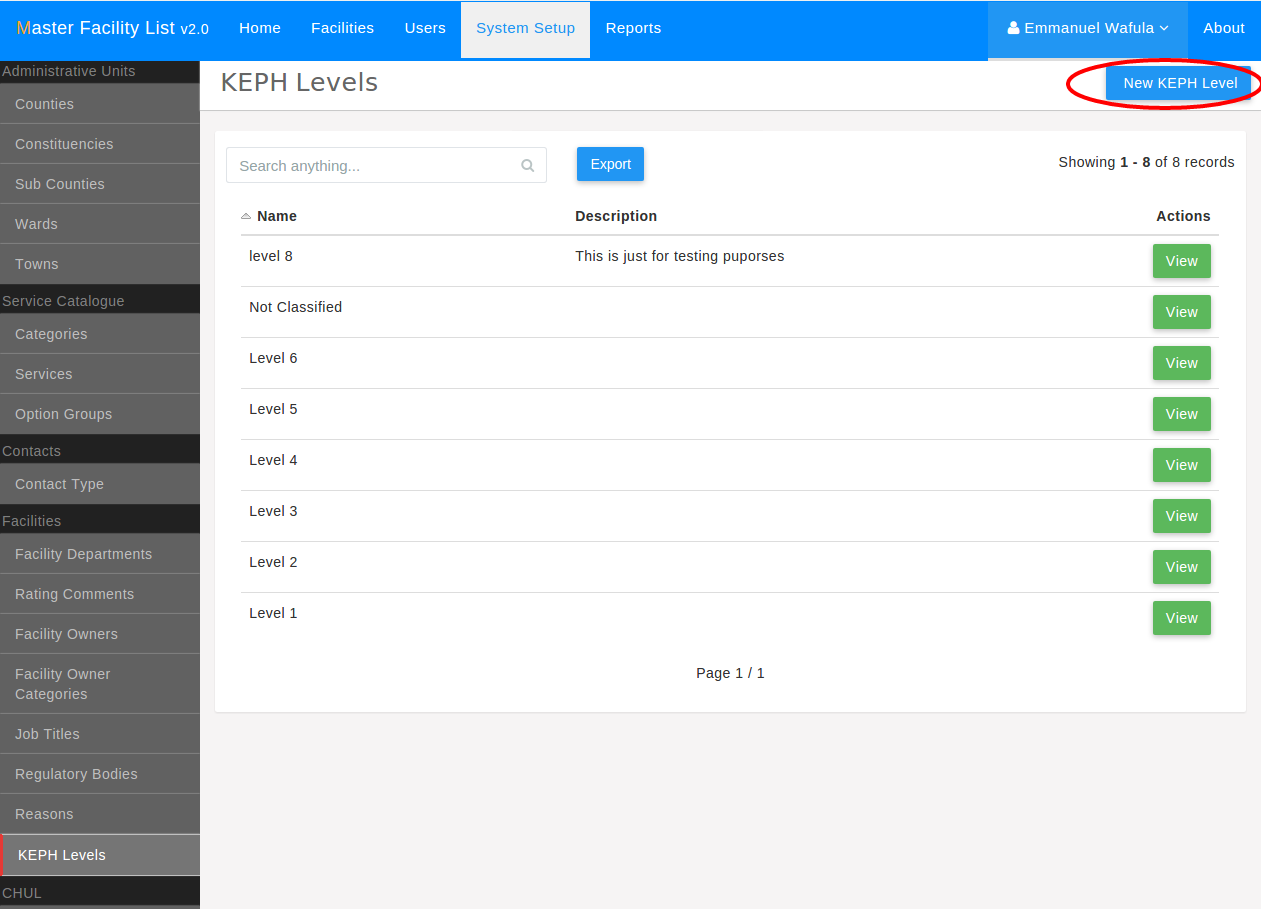
New KEPH levels can be created while existing ones can be updated or removed.
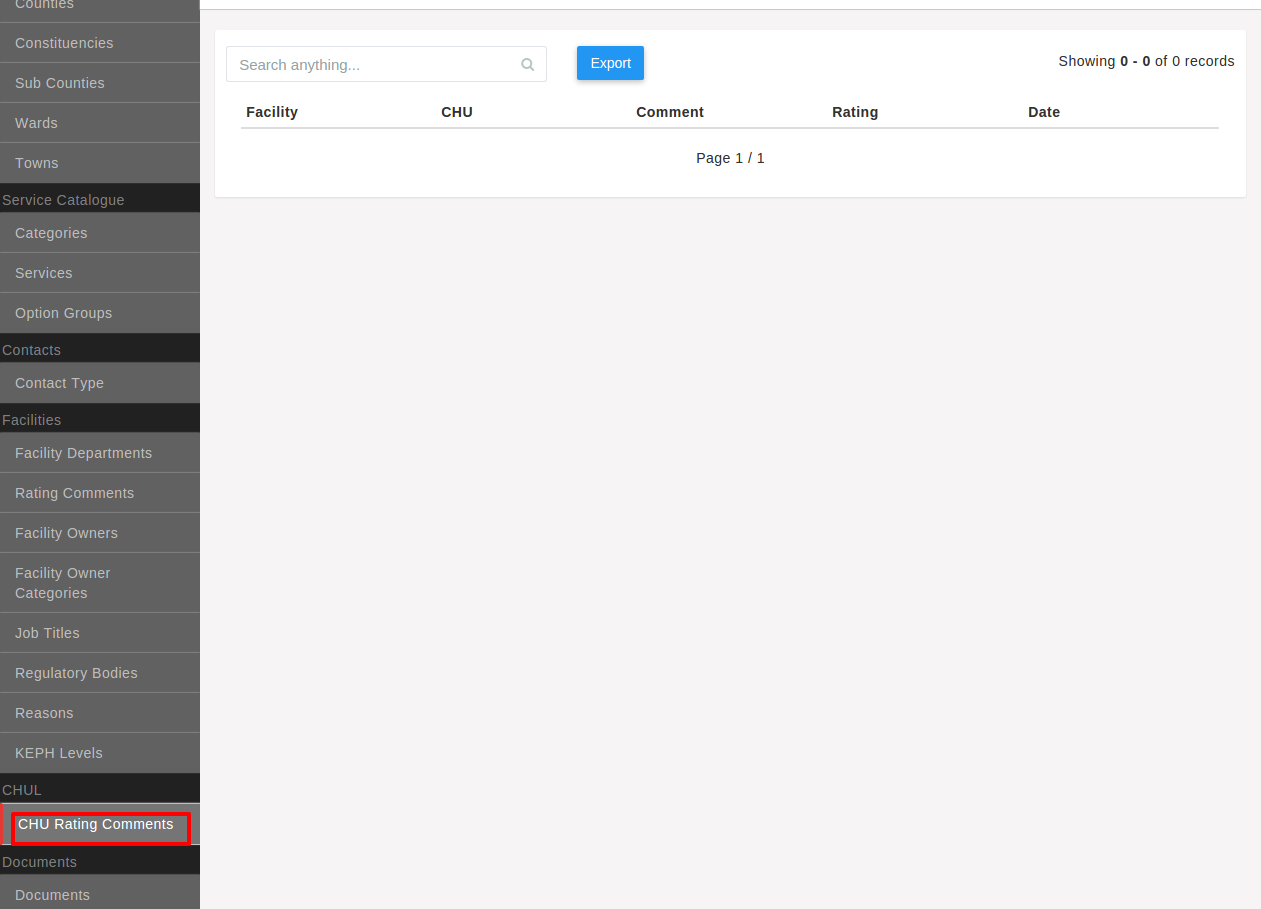
Public Feedback on Community Units
Feedback given by users of the public side of MFL can be viewed by administrator.
This can be accessed by visiting the CHU rating comments section in system setup.
Document Management
Documents are extra supplimentary material provided that accompany the MFL e.g. the Implementation Guide.
The national administrator can create, view, update and delete such documents.
To manage documents, select the documents section in the system setup screen.
The first screen shows a list of the available documents in MFL.
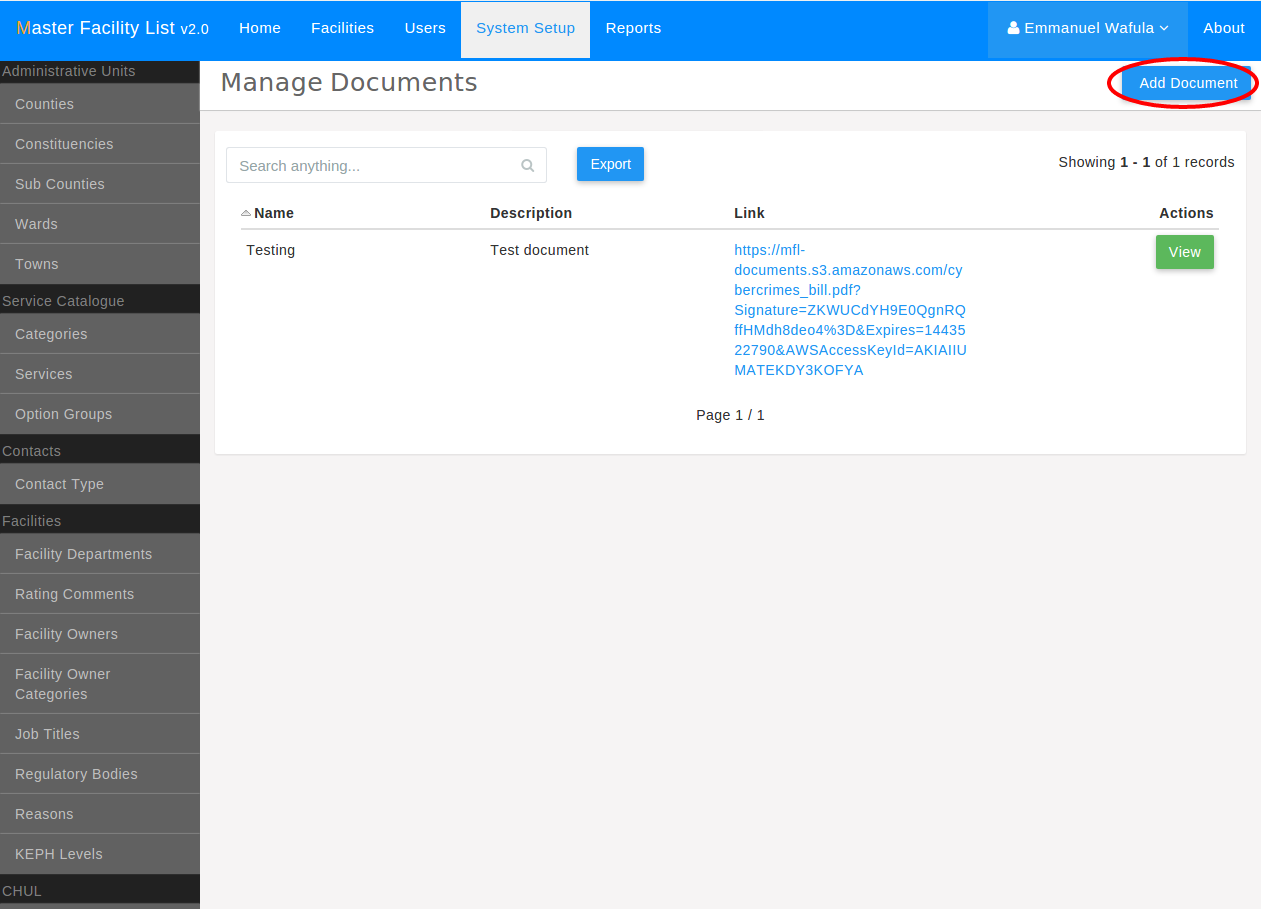
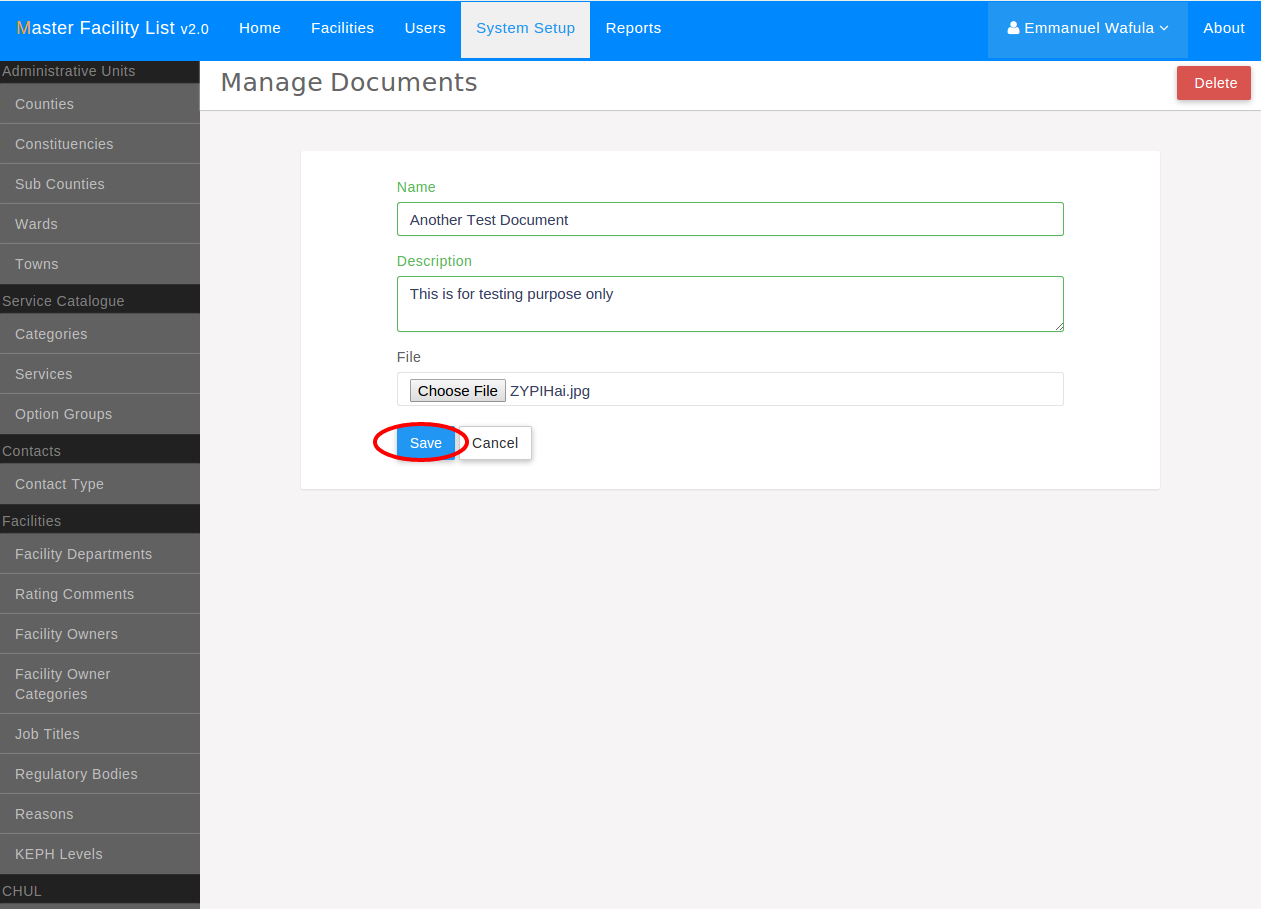
To create a new document, select the add document button and provide the name, description and file of the new document.
Geo-code Method Management
Geo-code methods are the methods used to collect facility geo-coordinates. To manage them,
select the geocode methods section in system setup.
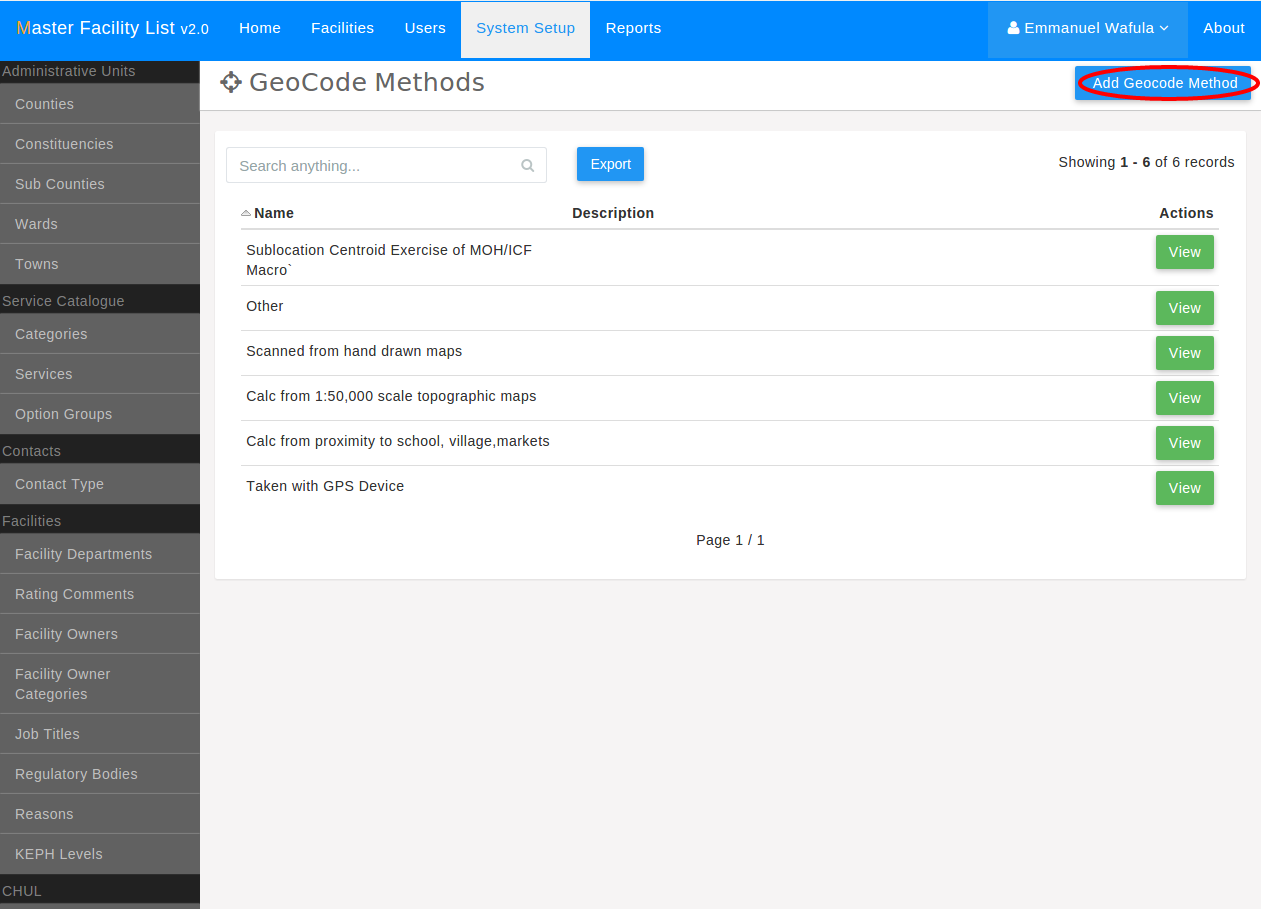
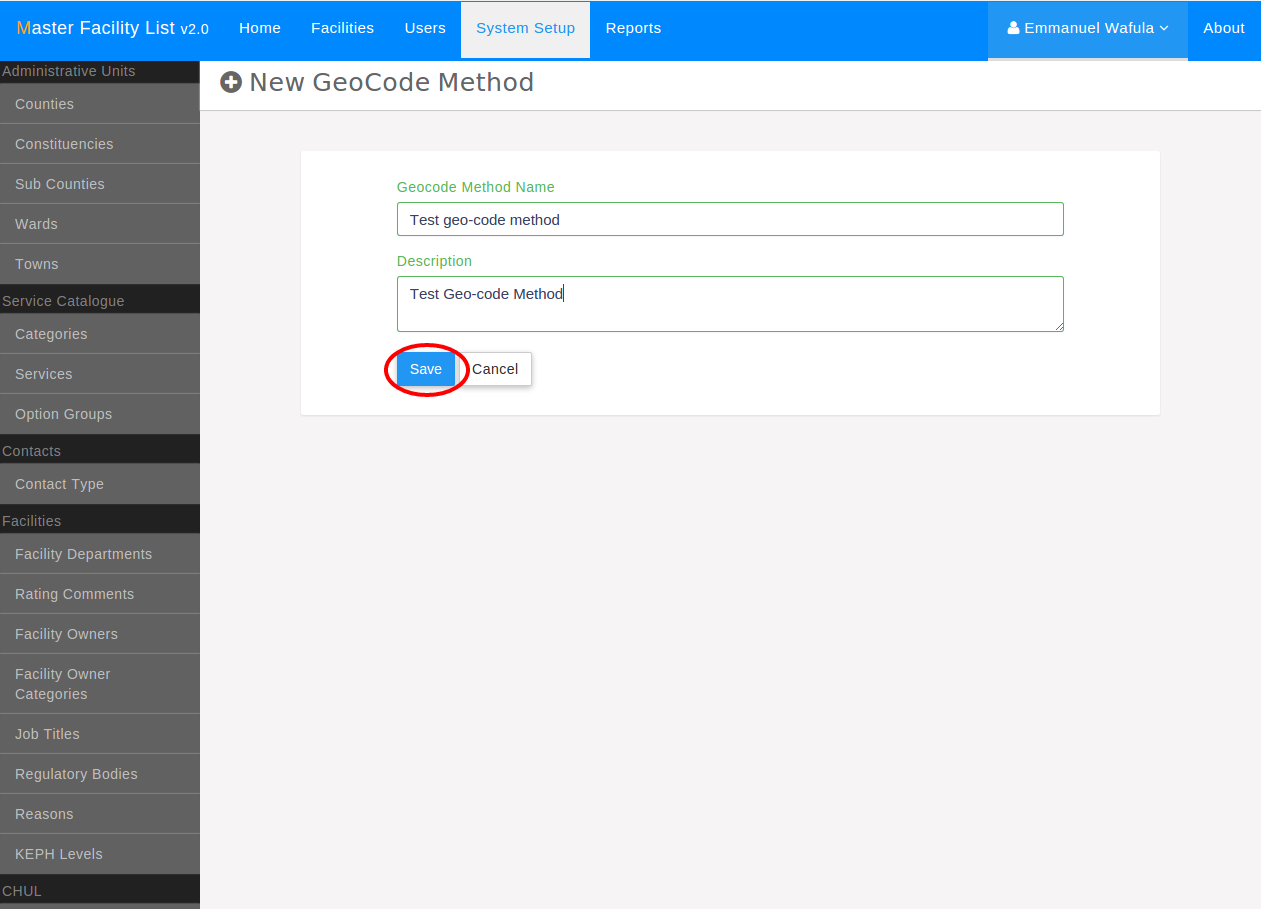
To create a new method, select the add geocode method button and fill in the details in the
resulting screen.
Geo-Code Source Management
Geo-code sources are the origins of the facility geo-coordinates. They accessible via the
geocode sources section in system setup.
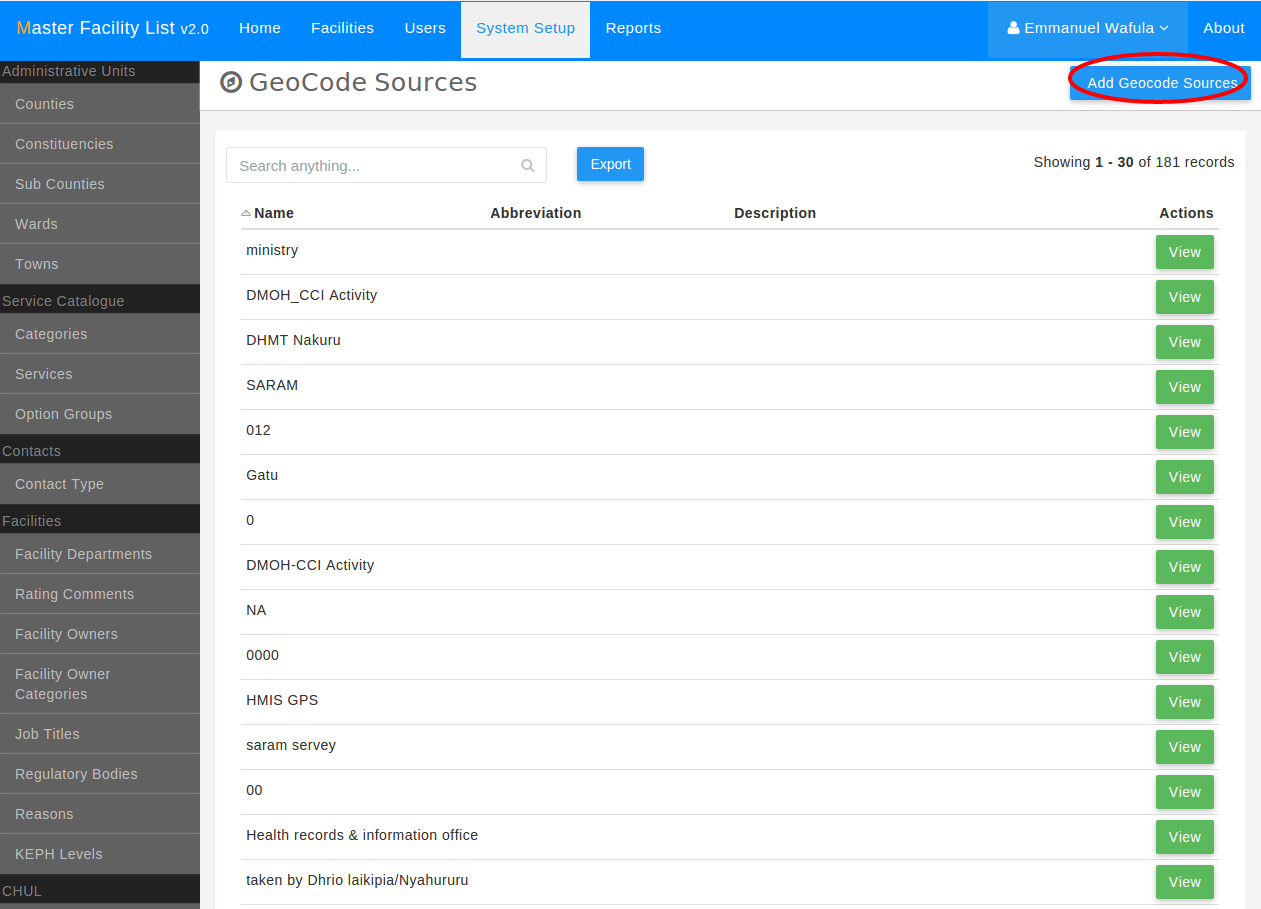
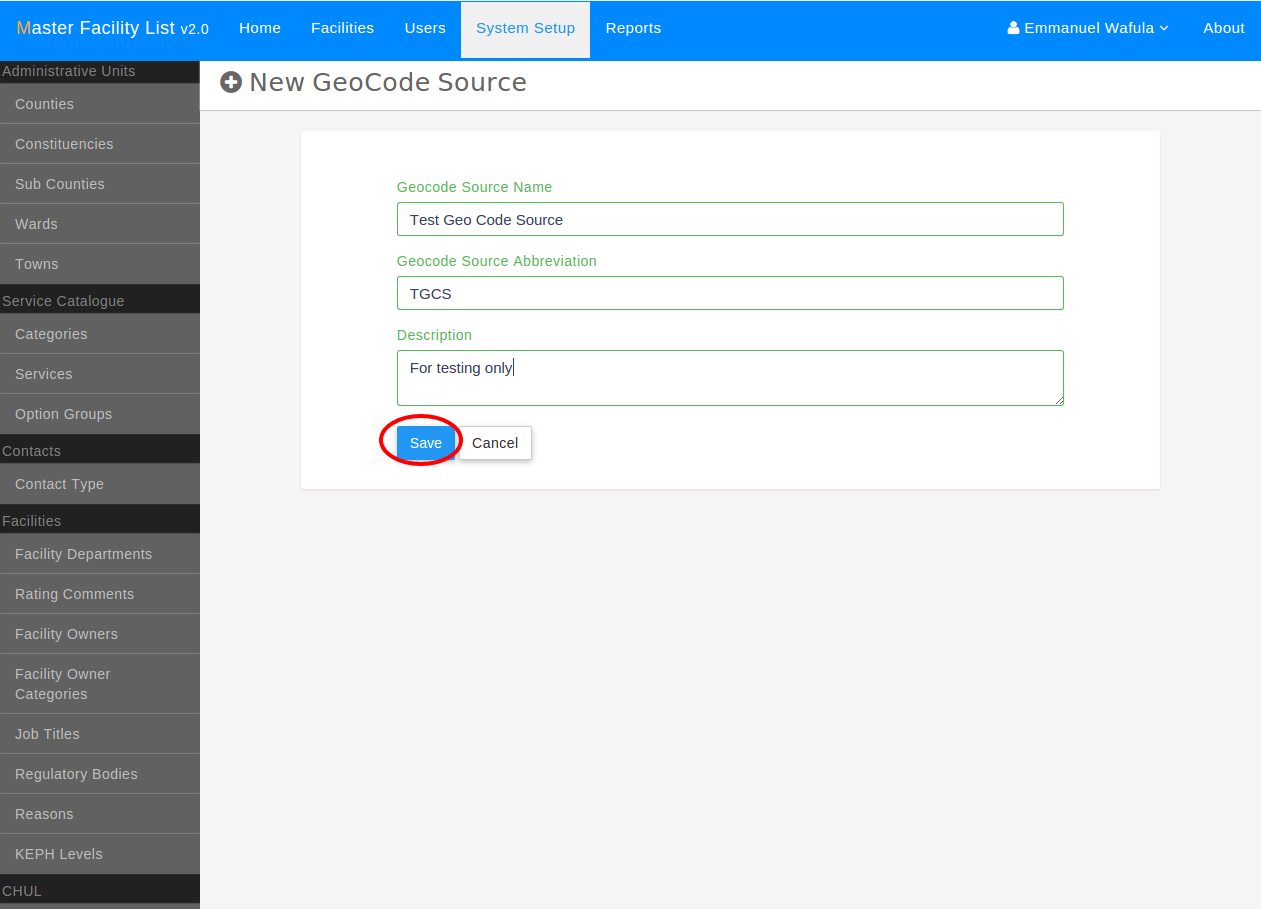
The add geocode sources link brings up a screen to create a new geocode source.
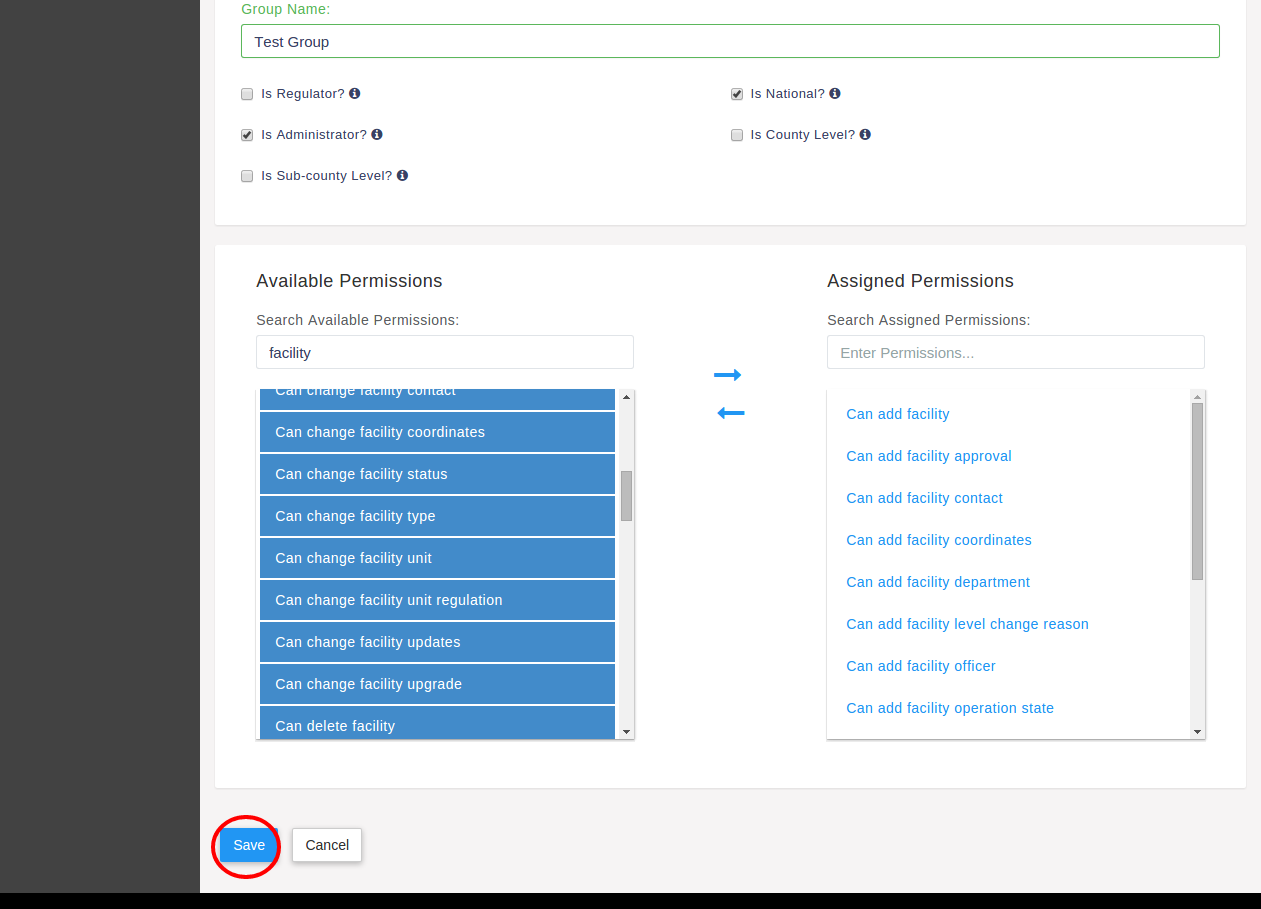
Group Management
A group is a collection of permissions that is assigned to users. Permissons are not assigned to users directly. Users are assigned groups and get the permissions in the assigned group.
To manage groups, click on the users link in the top navigation bar. In the
resulting screen, select groups in the left navigation bar. This will show a list
of groups in the system.

To create a group select the add group link in while in the groups viewing page. To
edit an existing group, select the group by clicking on the group’s name.
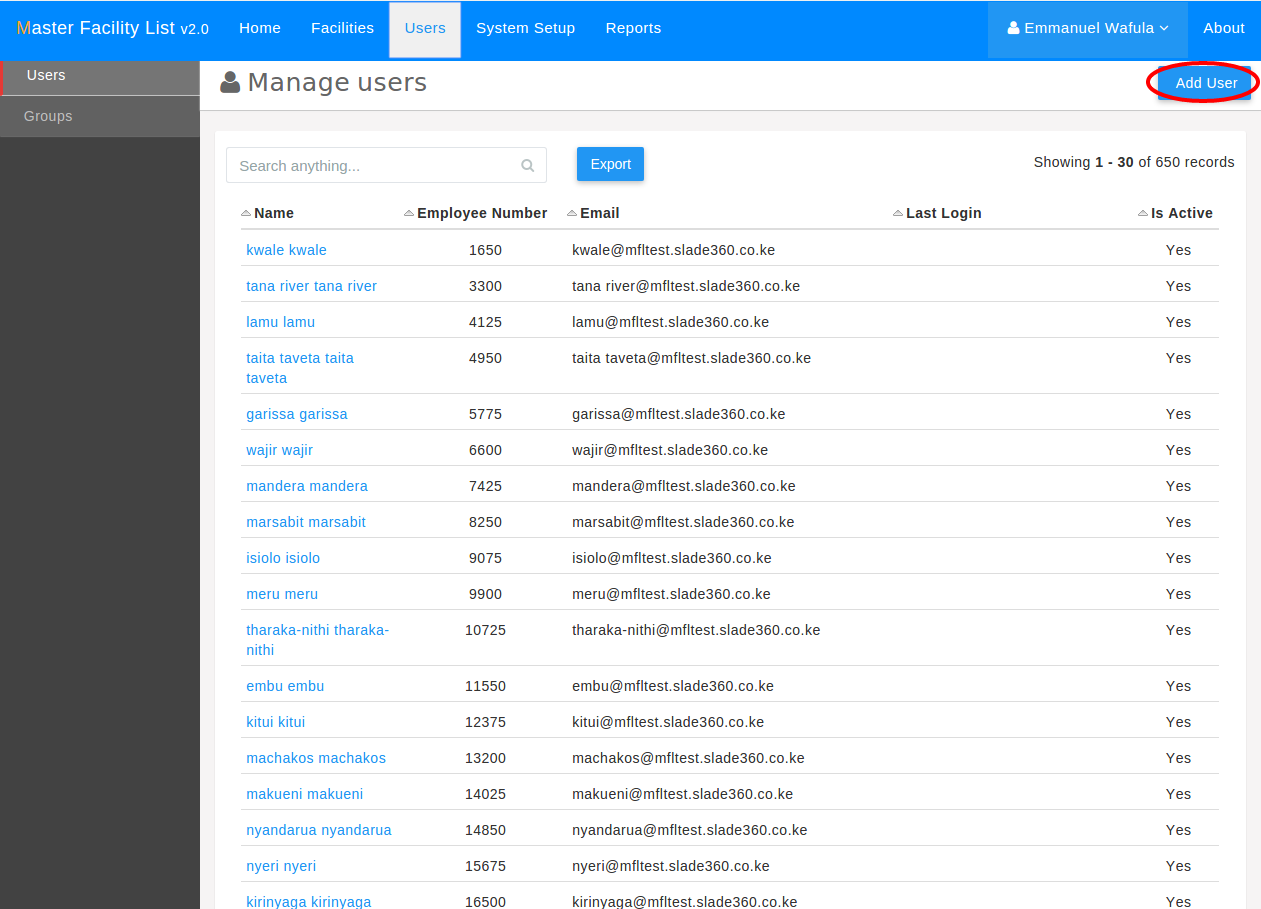
User Management
The national administrator can be able to view all users in the system. To access user
management, select users in the top navigation bar. The resulting screen shows a
list of users in the system.
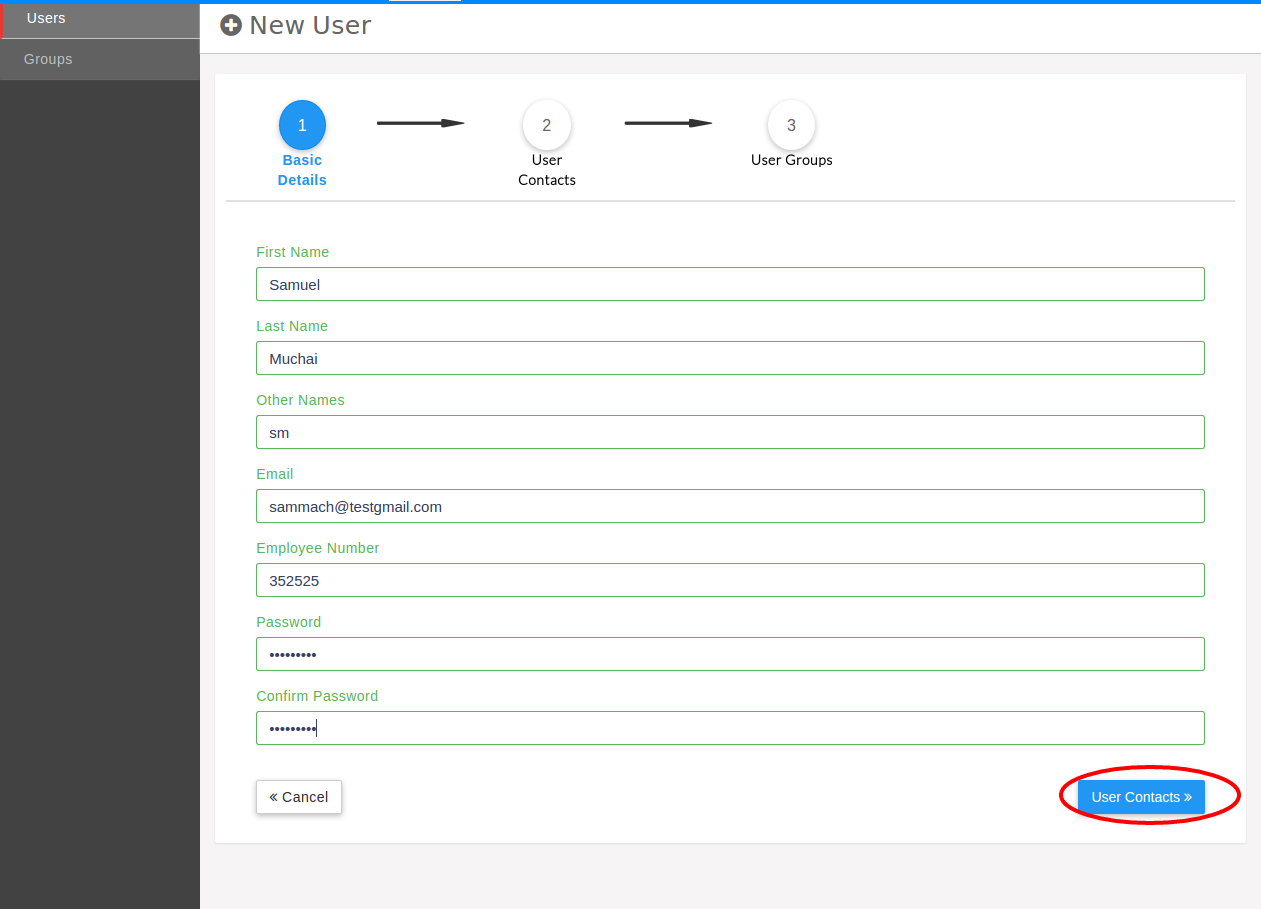
To create a new user, click the add user button.
Creating a user has at least three steps : basic details, contacts and assigning groups. The basic details comprise of the users names, password, email e.t.c.
The user contacts are next after basic details.
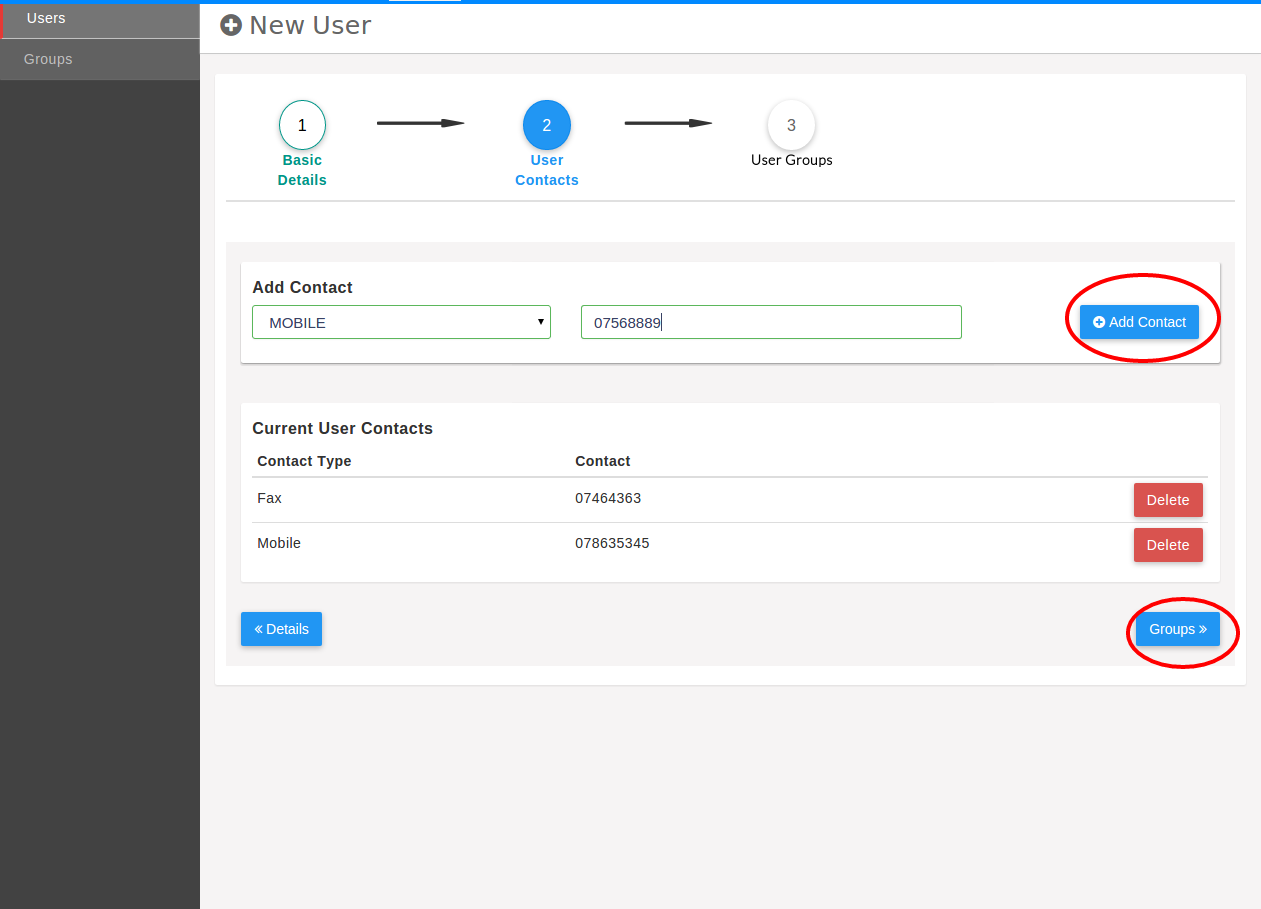
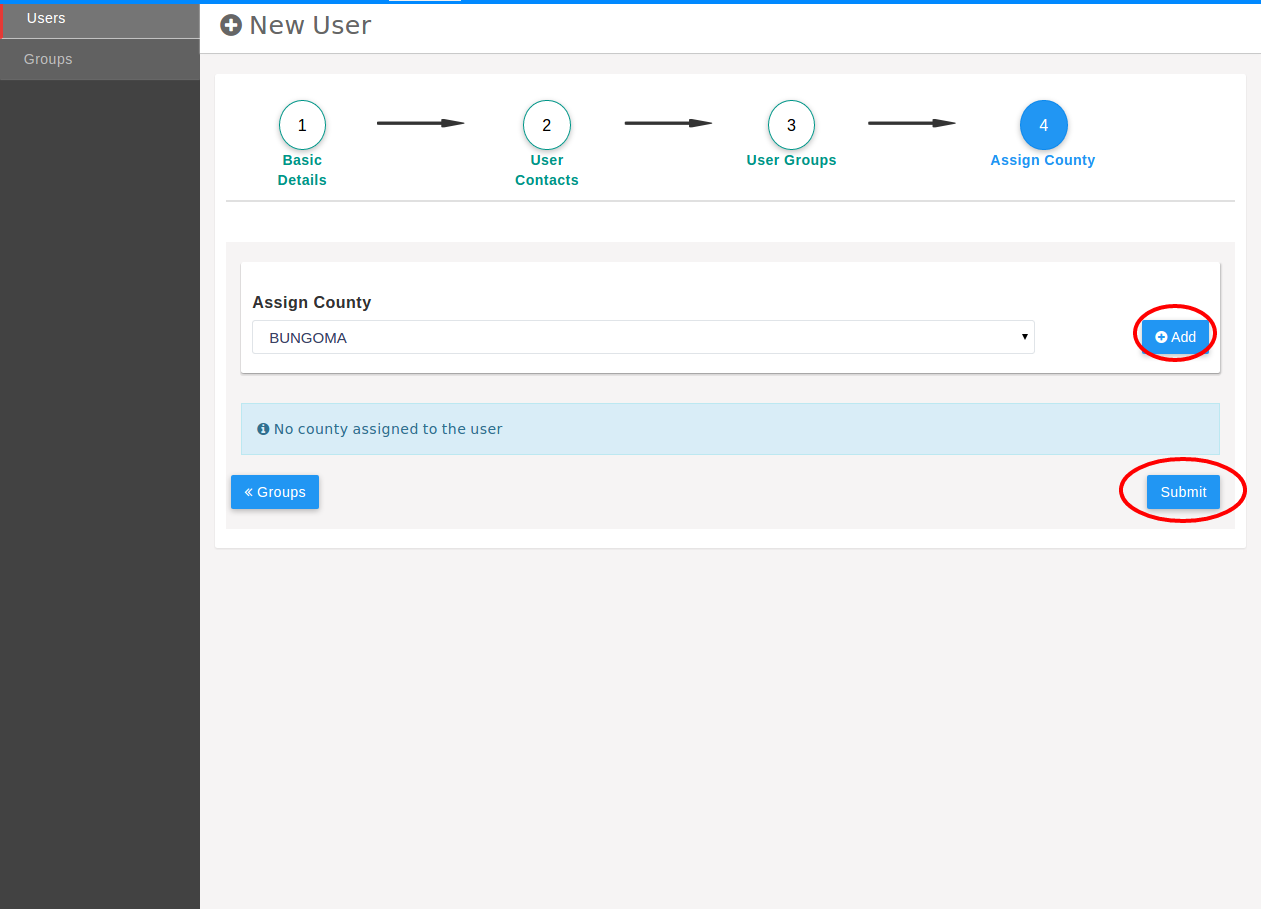
Assigning groups to users comes after updating their contacts. A user can belong to one or more groups.
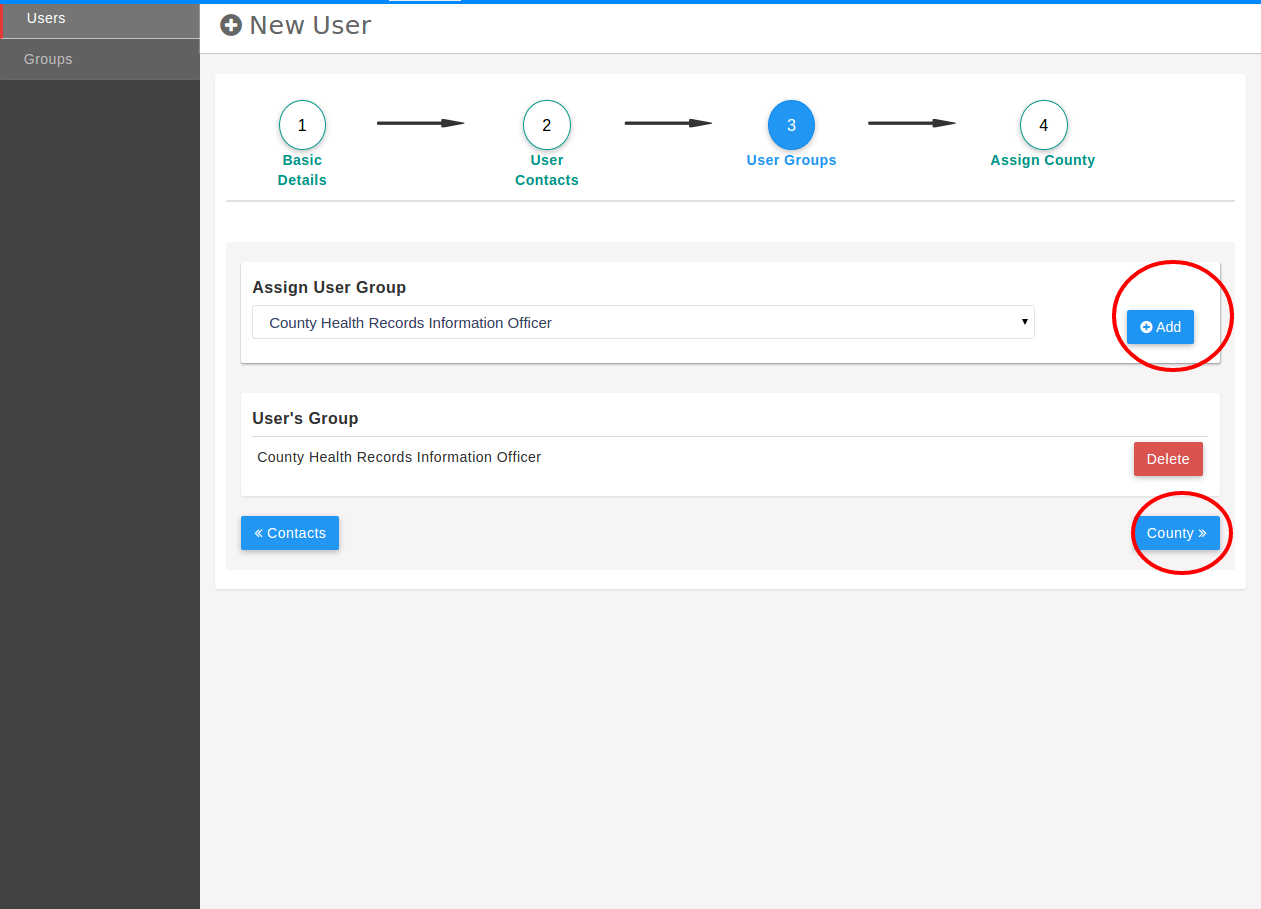
Depending on the group selected, the user is assigned an administrative unit. For example, if the user’s group is a County Health Records Information Officer, then the user is assigned a county as shown below.